Rclone
Общая информация.
Rclone.
Установка и подключение облачных хранилищ.
Установка:
- Переходим в
APPS, в поиске пишемRclone, и устанавливаем тот, что плагин:
- Затем открываем терминал сервера, и пишем
rclone config:
rclone config
No remotes found - make a new one
n) New remote
s) Set configuration password
q) Quit config
- Выбираем
n- Новое подключение:
n/s/q> n
- Даем названием этому подключению:
name> mega
Type of storage to configure.
Enter a string value. Press Enter for the default ("").
Choose a number from below, or type in your own value
 1 / 1Fichier
   \ "fichier"
 2 / Alias for an existing remote
   \ "alias"
 3 / Amazon Drive
   \ "amazon cloud drive"
 4 / Amazon S3 Compliant Storage Providers including AWS, Alibaba, Ceph, Digital Ocean, Dreamhost, IBM COS, Minio, and Tencent COS
   \ "s3"
 5 / Backblaze B2
   \ "b2"
 6 / Box
   \ "box"
 7 / Cache a remote
   \ "cache"
 8 / Citrix Sharefile
   \ "sharefile"
 9 / Compress a remote
   \ "compress"
10 / Dropbox
   \ "dropbox"
11 / Encrypt/Decrypt a remote
   \ "crypt"
12 / Enterprise File Fabric
   \ "filefabric"
13 / FTP Connection
   \ "ftp"
14 / Google Cloud Storage (this is not Google Drive)
   \ "google cloud storage"
15 / Google Drive
   \ "drive"
16 / Google Photos
   \ "google photos"
17 / Hadoop distributed file system
   \ "hdfs"
18 / Hubic
   \ "hubic"
19 / In memory object storage system.
   \ "memory"
20 / Jottacloud
   \ "jottacloud"
21 / Koofr
   \ "koofr"
22 / Local Disk
   \ "local"
23 / Mail.ru Cloud
   \ "mailru"
24 / Mega
   \ "mega"
25 / Microsoft Azure Blob Storage
   \ "azureblob"
26 / Microsoft OneDrive
   \ "onedrive"
27 / OpenDrive
   \ "opendrive"
28 / OpenStack Swift (Rackspace Cloud Files, Memset Memstore, OVH)
   \ "swift"
29 / Pcloud
   \ "pcloud"
30 / Put.io
   \ "putio"
31 / QingCloud Object Storage
   \ "qingstor"
32 / SSH/SFTP Connection
   \ "sftp"
33 / Sugarsync
   \ "sugarsync"
34 / Tardigrade Decentralized Cloud Storage
   \ "tardigrade"
35 / Transparently chunk/split large files
   \ "chunker"
36 / Union merges the contents of several upstream fs
   \ "union"
37 / Webdav
   \ "webdav"
38 / Yandex Disk
   \ "yandex"
39 / Zoho
   \ "zoho"
40 / http Connection
   \ "http"
41 / premiumize.me
   \ "premiumizeme"
42 / seafile
   \ "seafile"
- Под номером
24Мега, выбираем ее, поэтому пишем:
Storage> 24
** See help for mega backend at: https://rclone.org/mega/ **
User name
Enter a string value. Press Enter for the default ("").
- Вводим логин от аккаунта Меги:
user> myAccount@mail.ru
Password.
y) Yes type in my own password
g) Generate random password
- Выбираем
y:
y/g> y
Enter the password:
- Вводим пароль от аккаунта Меги:
password:
Confirm the password:
- Подтверждаем пароль:
password:
Edit advanced config? (y/n)
y) Yes
n) No (default)
- Выбираем настройки по умолчанию, жмем
n:
y/n> n
Remote config
--------------------
[mega_1]
type = mega
user = mail@muwahhid.ru
pass = *** ENCRYPTED ***
--------------------
y) Yes this is OK (default)
e) Edit this remote
d) Delete this remote
- Жмем
y:
y/e/d> y
Current remotes:

Name                 Type
====                 ====
mega_1               mega

e) Edit existing remote
n) New remote
d) Delete remote
r) Rename remote
c) Copy remote
s) Set configuration password
q) Quit config
e/n/d/r/c/s/q>
- Тут уже
q, выходим, настройки окончены.
q) e/n/d/r/c/s/q> q
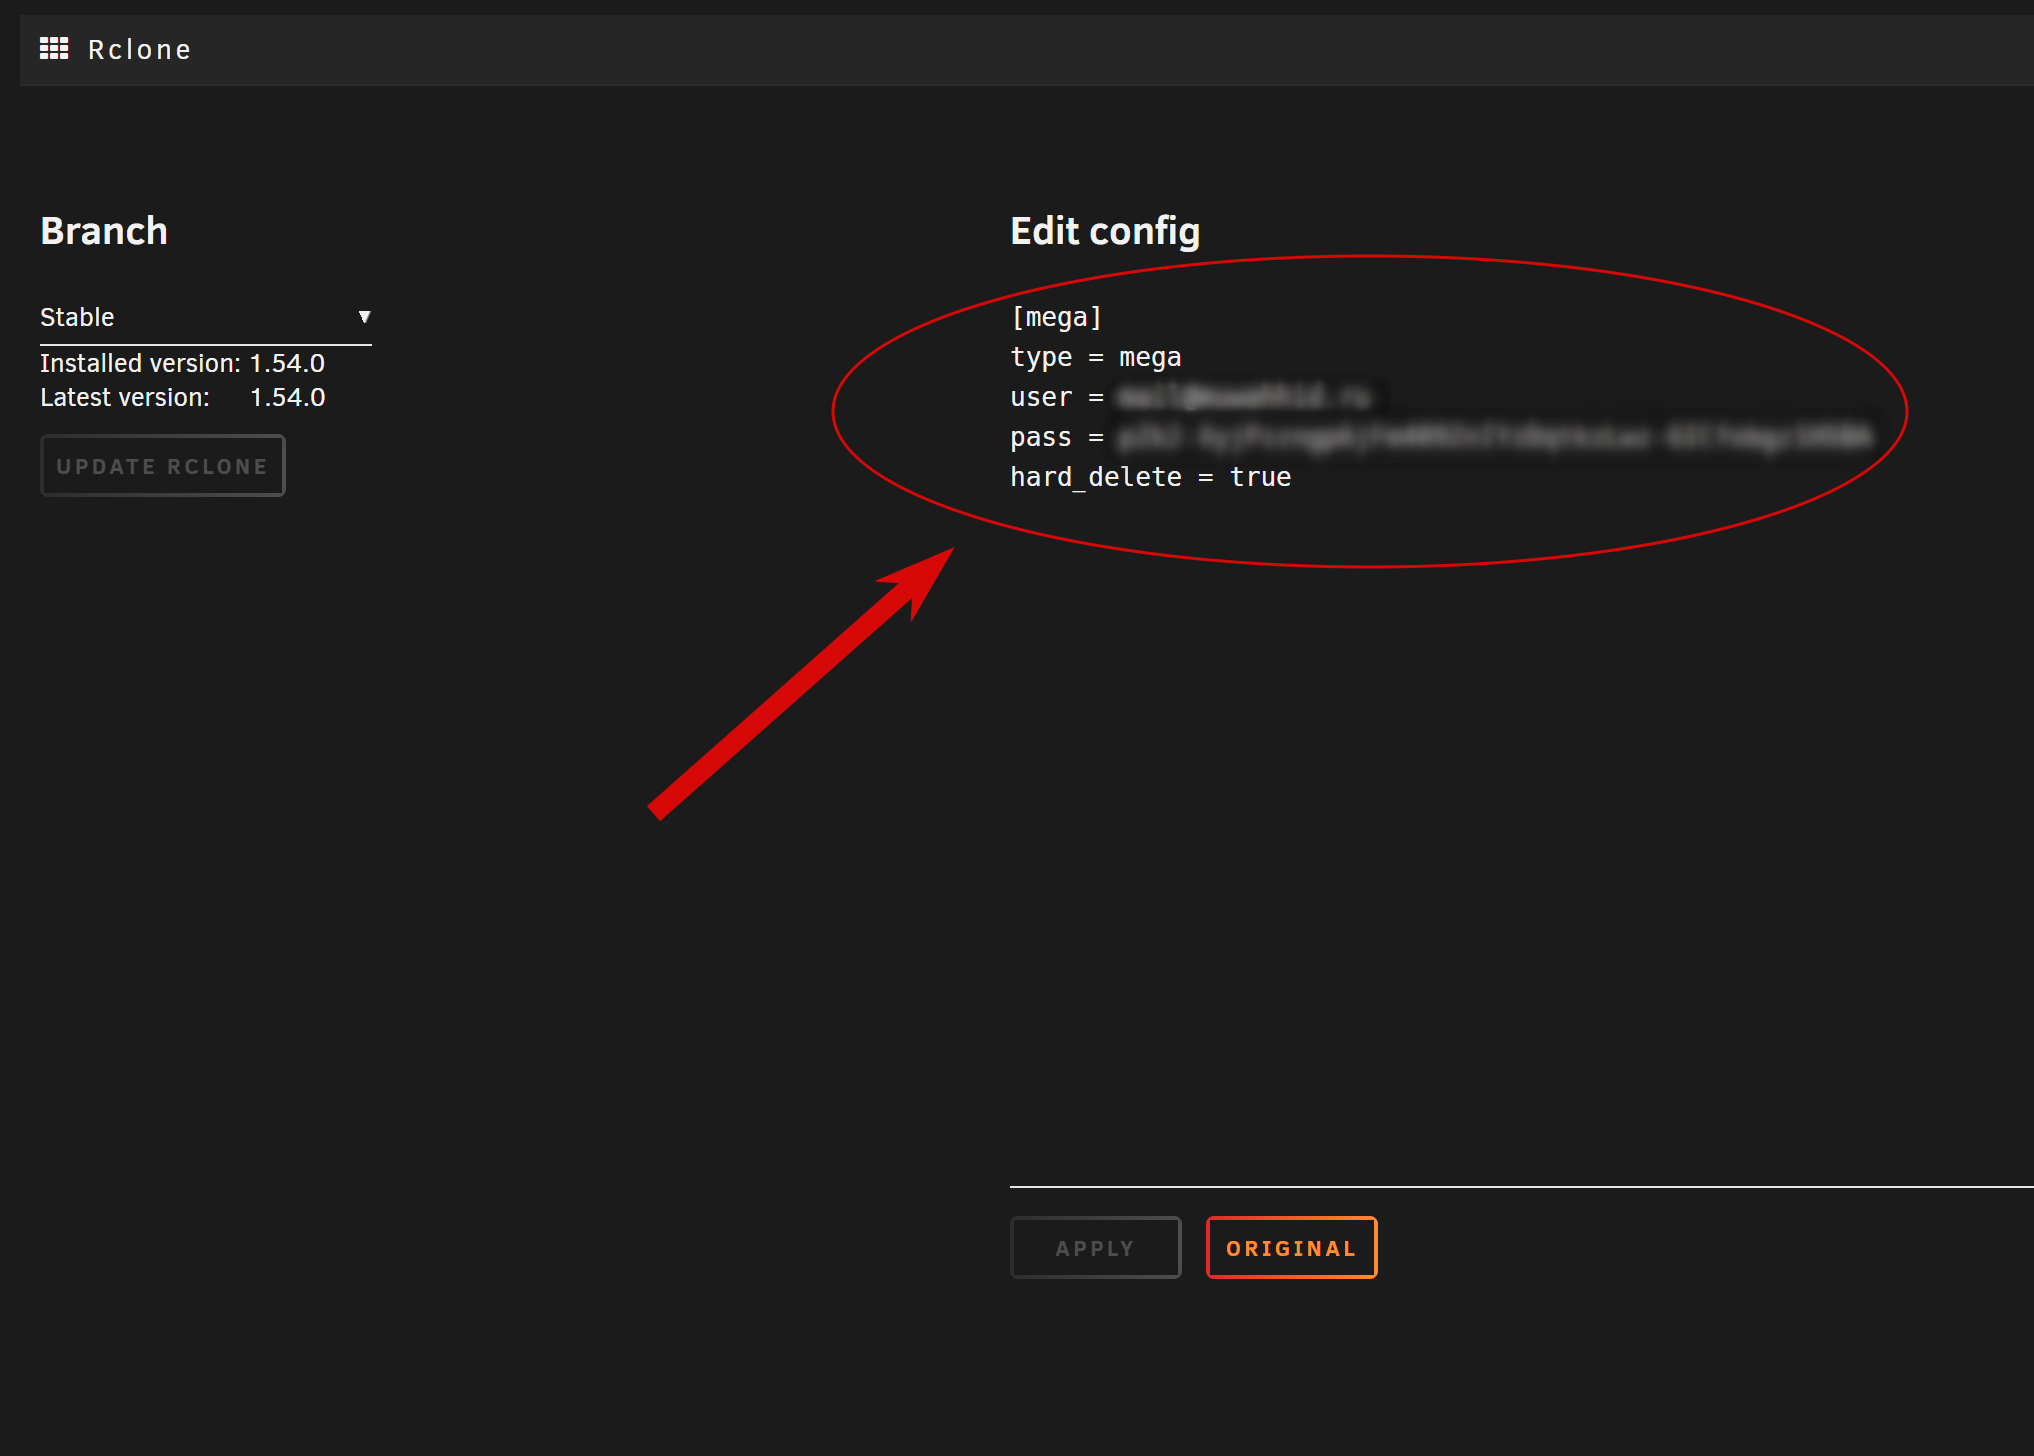
Проверяем, сохранились ли настройки.
- Заходим в
Settings, далееRclone:
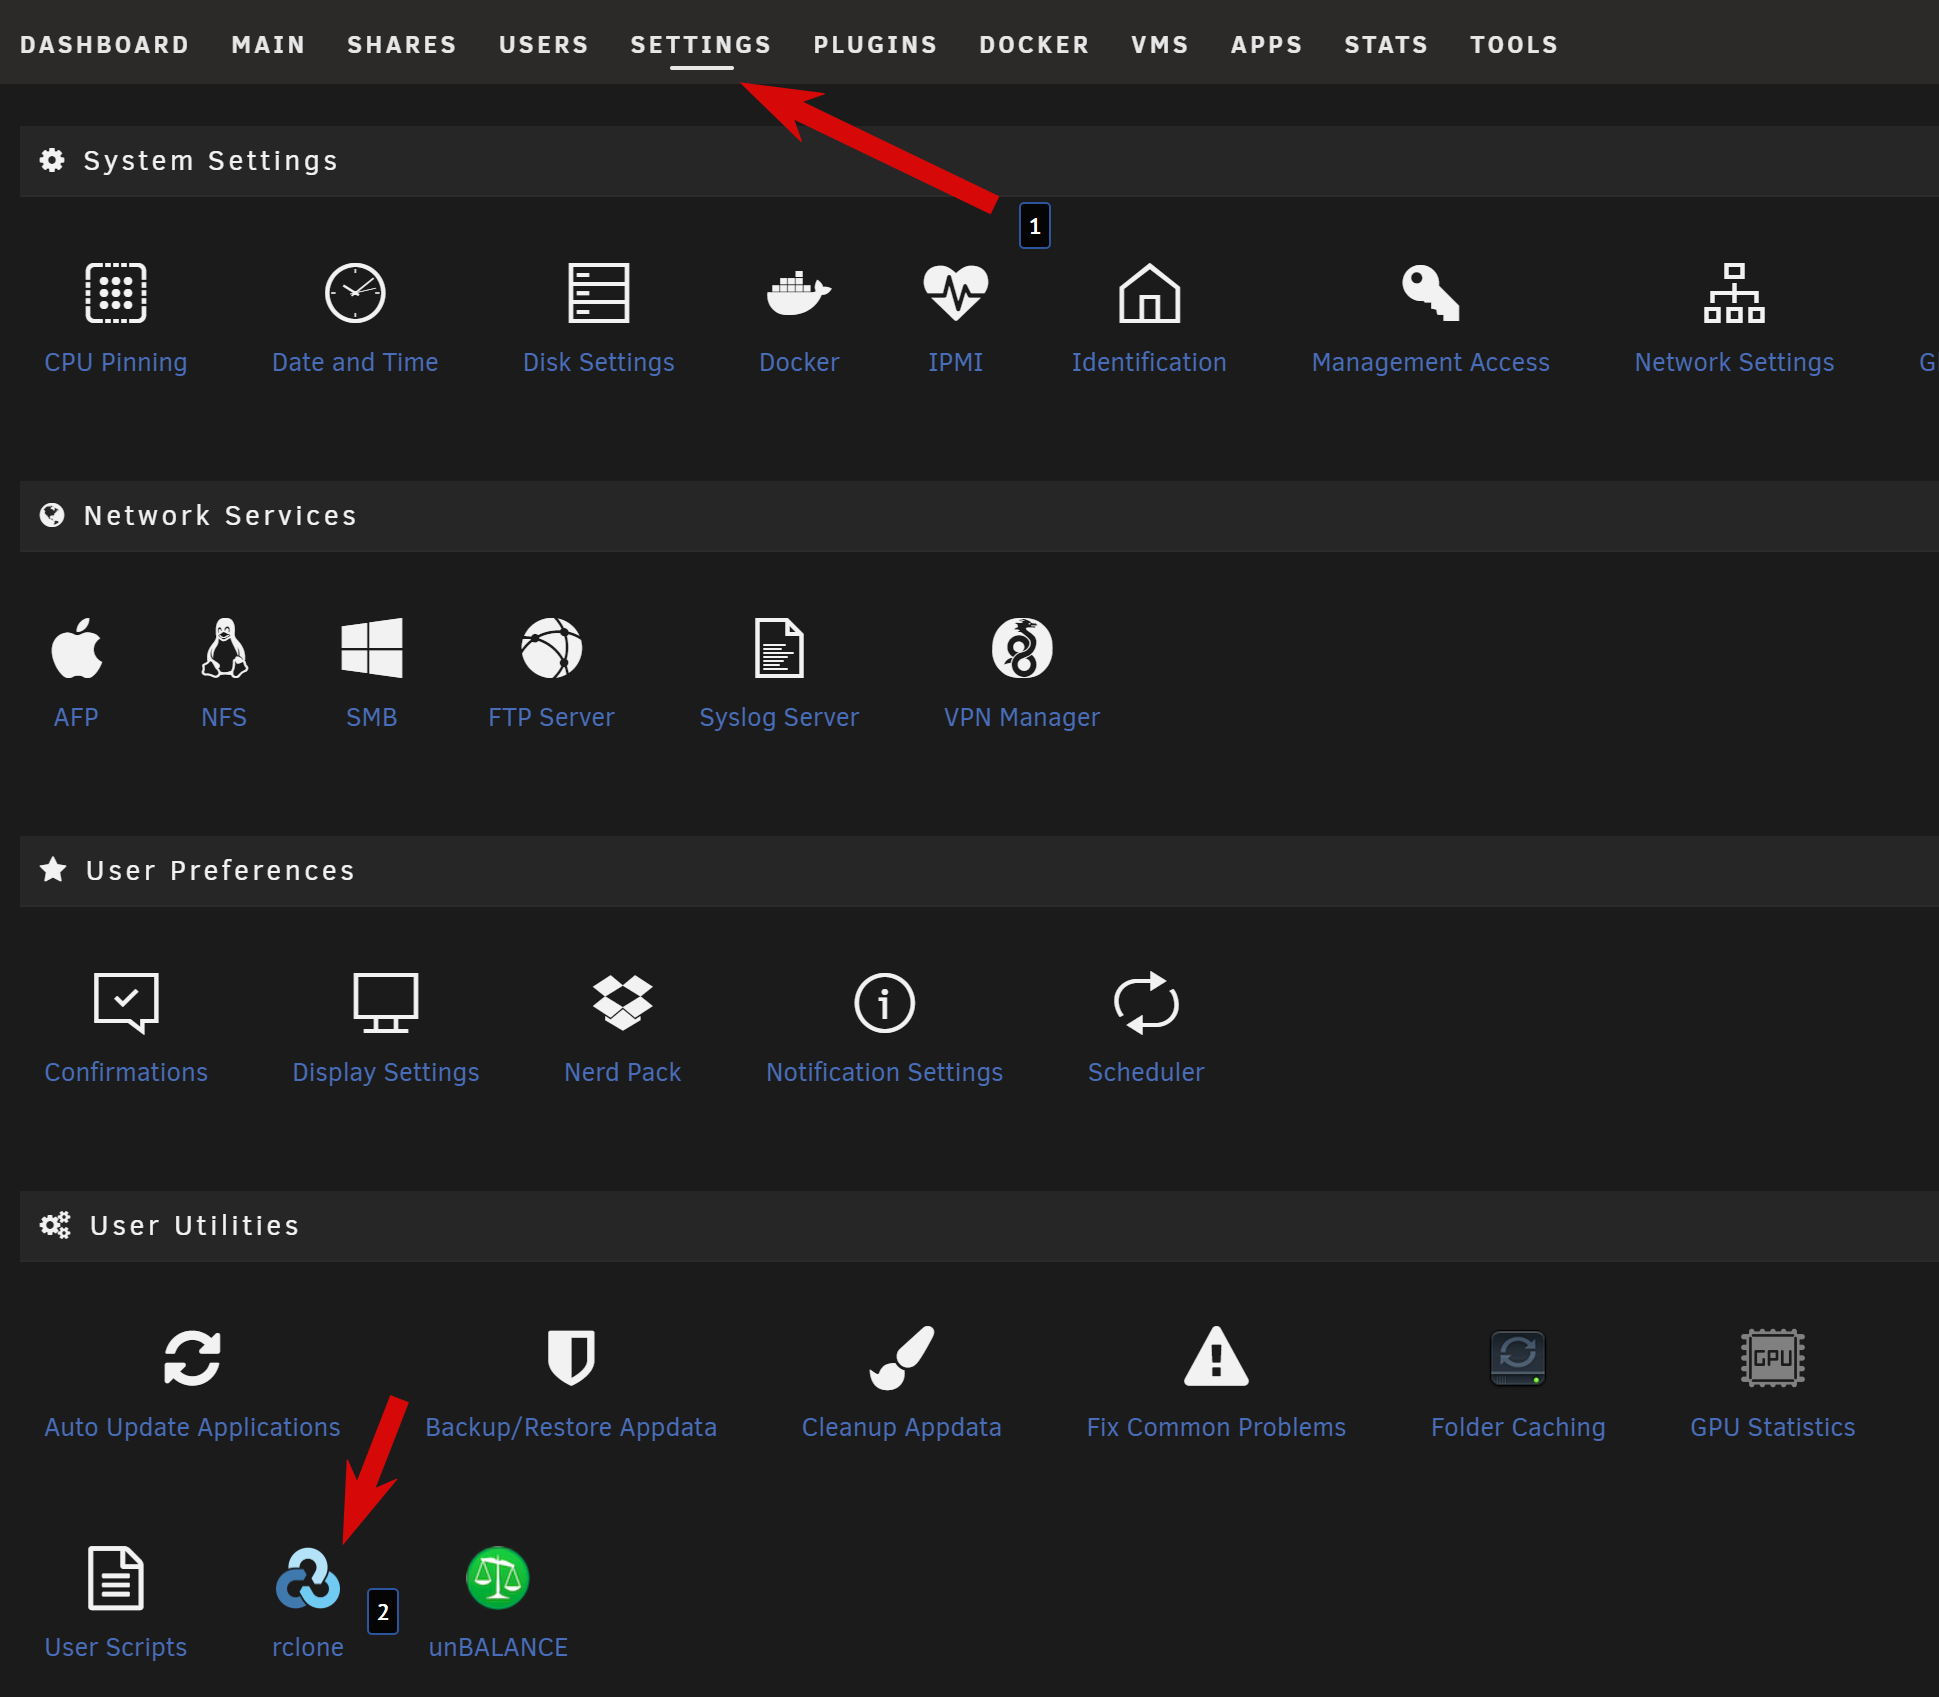
- Видим, что все
ОК:
Монтируем к серверу, подключенное облачное хранилище.
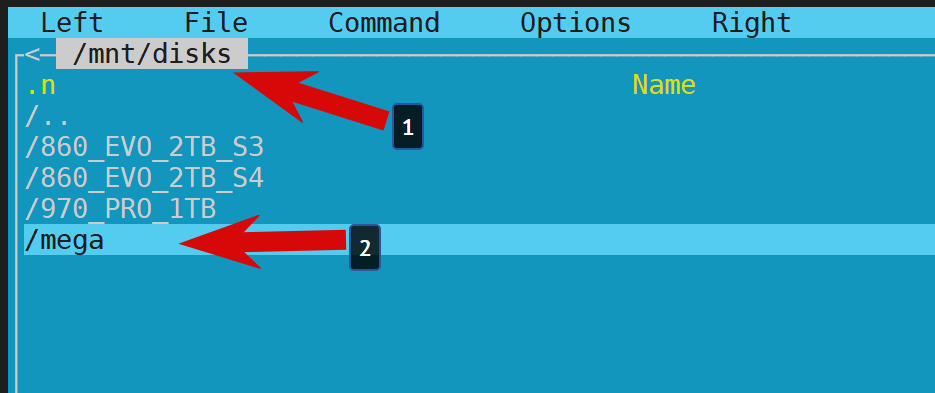
- Создаем папку
megaпо пути /mnt/disks/mega:
mkdir -p /mnt/disks/mega
- Монтируем к созданной папке, облако:
rclone mount --max-read-ahead 1024k --vfs-cache-mode full --allow-other mega: /mnt/disks/mega &
- Проверяем результат:
- Размонтируем командой:
fusermount -u /mnt/disks/mega
Добавляем маунт в User scripts, чтоб с перезагрузкой, подключение не пропало.
- Проходим
Settings,User scripts. - Затем жмем
Add new sript. - В поле ввода пишем команда монтирования.
rclone mount --max-read-ahead 1024k --vfs-cache-mode full --allow-other mega: /mnt/disks/mega &
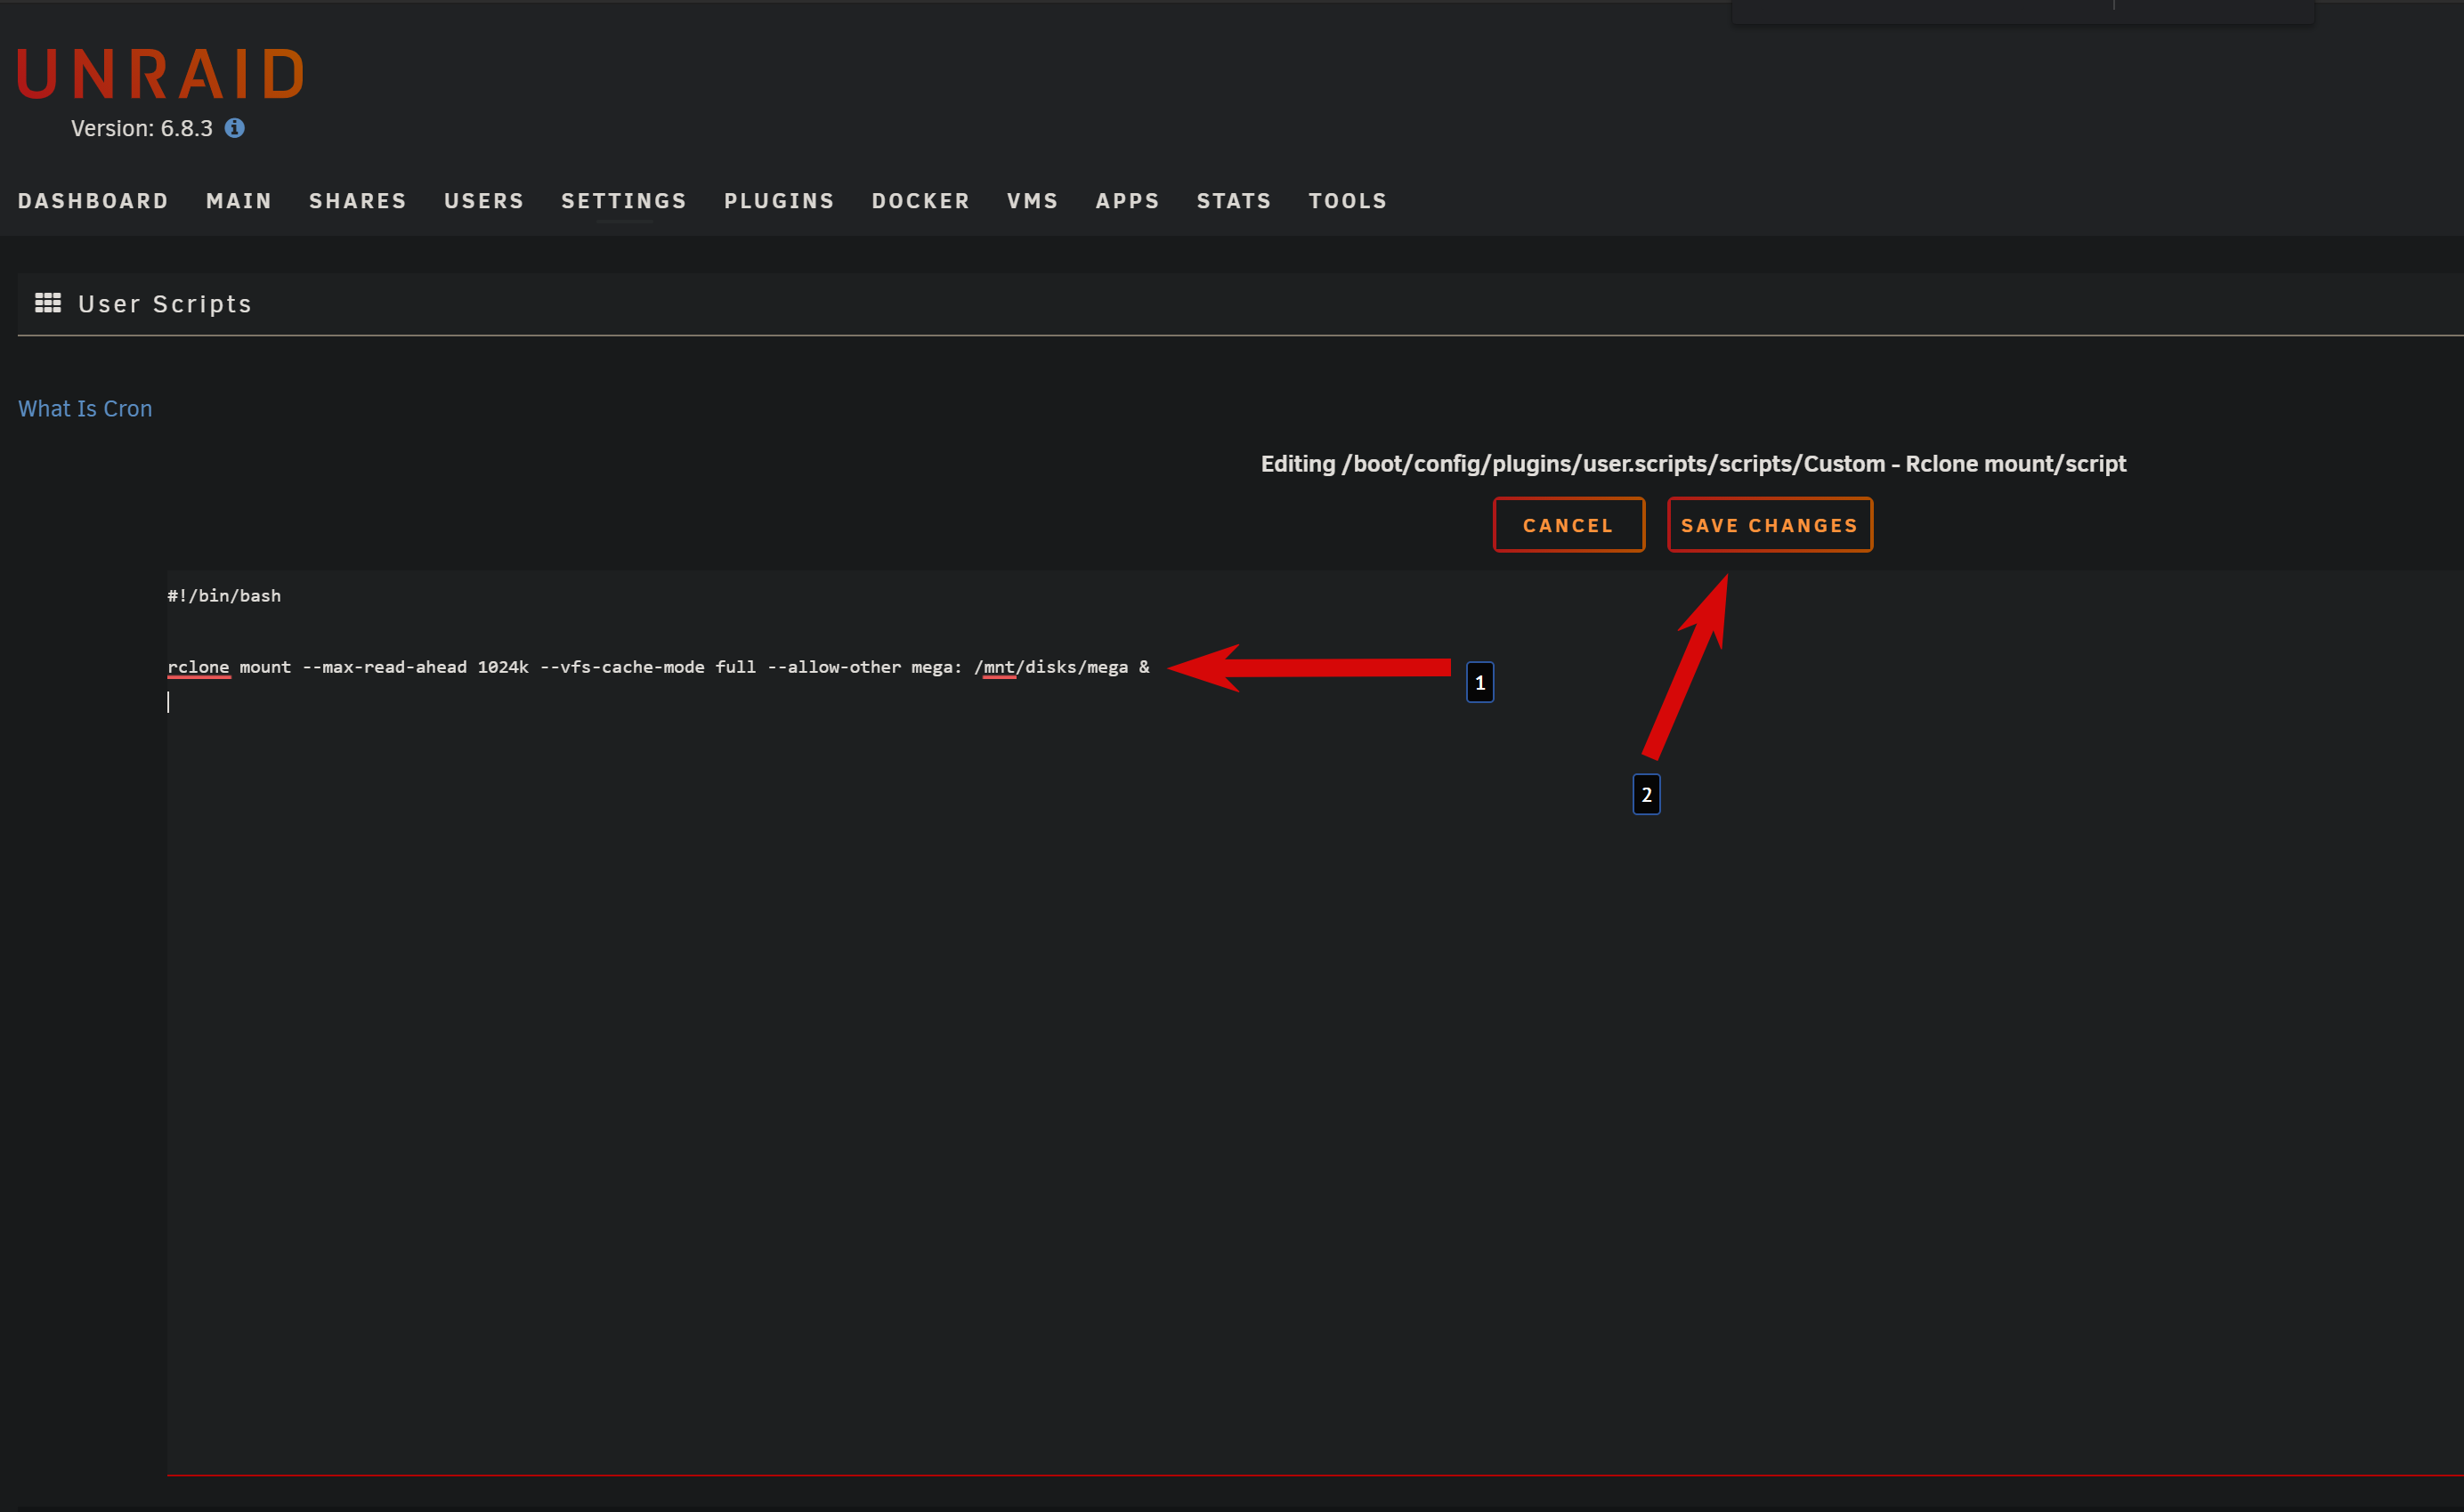
- Сохраняем.
- Затем ставим расписание, со стартом массива -
At startup of array:

Добавляем Google Drive.
Создаем подключение.
- Открываем терминал сервера, и пишем
rclone config:
rclone config
No remotes found - make a new one
n) New remote
s) Set configuration password
q) Quit config
- Выбираем
n- Новое подключение:
n/s/q> n
- Даем названием этому подключению:
name> google_drive
Type of storage to configure.
Enter a string value. Press Enter for the default ("").
Choose a number from below, or type in your own value
 1 / 1Fichier
   \ "fichier"
 2 / Alias for an existing remote
   \ "alias"
 3 / Amazon Drive
   \ "amazon cloud drive"
 4 / Amazon S3 Compliant Storage Providers including AWS, Alibaba, Ceph, Digital Ocean, Dreamhost, IBM COS, Minio, and Tencent COS
   \ "s3"
 5 / Backblaze B2
   \ "b2"
 6 / Box
   \ "box"
 7 / Cache a remote
   \ "cache"
 8 / Citrix Sharefile
   \ "sharefile"
 9 / Compress a remote
   \ "compress"
10 / Dropbox
   \ "dropbox"
11 / Encrypt/Decrypt a remote
   \ "crypt"
12 / Enterprise File Fabric
   \ "filefabric"
13 / FTP Connection
   \ "ftp"
14 / Google Cloud Storage (this is not Google Drive)
   \ "google cloud storage"
15 / Google Drive
   \ "drive"
16 / Google Photos
   \ "google photos"
17 / Hadoop distributed file system
   \ "hdfs"
18 / Hubic
   \ "hubic"
19 / In memory object storage system.
   \ "memory"
20 / Jottacloud
   \ "jottacloud"
21 / Koofr
   \ "koofr"
22 / Local Disk
   \ "local"
23 / Mail.ru Cloud
   \ "mailru"
24 / Mega
   \ "mega"
25 / Microsoft Azure Blob Storage
   \ "azureblob"
26 / Microsoft OneDrive
   \ "onedrive"
27 / OpenDrive
   \ "opendrive"
28 / OpenStack Swift (Rackspace Cloud Files, Memset Memstore, OVH)
   \ "swift"
29 / Pcloud
   \ "pcloud"
30 / Put.io
   \ "putio"
31 / QingCloud Object Storage
   \ "qingstor"
32 / SSH/SFTP Connection
   \ "sftp"
33 / Sugarsync
   \ "sugarsync"
34 / Tardigrade Decentralized Cloud Storage
   \ "tardigrade"
35 / Transparently chunk/split large files
   \ "chunker"
36 / Union merges the contents of several upstream fs
   \ "union"
37 / Webdav
   \ "webdav"
38 / Yandex Disk
   \ "yandex"
39 / Zoho
   \ "zoho"
40 / http Connection
   \ "http"
41 / premiumize.me
   \ "premiumizeme"
42 / seafile
   \ "seafile"
Google Driveпод номером15, вводим:
Storage> 15
** See help for drive backend at: https://rclone.org/drive/ **

Google Application Client Id
Setting your own is recommended.
See https://rclone.org/drive/#making-your-own-client-id for how to create your own.
If you leave this blank, it will use an internal key which is low performance.
Enter a string value. Press Enter for the default ("").
- Далее, оба раза вводим
enter, тут:
client_id>
OAuth Client Secret
Leave blank normally.
Enter a string value. Press Enter for the default ("").
- И тут:
client_secret>
Scope that rclone should use when requesting access from drive.
Enter a string value. Press Enter for the default ("").
Choose a number from below, or type in your own value
 1 / Full access all files, excluding Application Data Folder.
   \ "drive"
 2 / Read-only access to file metadata and file contents.
   \ "drive.readonly"
   / Access to files created by rclone only.
 3 | These are visible in the drive website.
   | File authorization is revoked when the user deauthorizes the app.
   \ "drive.file"
   / Allows read and wri
- Выбираю тут режим под номером
1:
scope> 1
ID of the root folder
Leave blank normally.

Fill in to access "Computers" folders (see docs), or for rclone to use
a non root folder as its starting point.

Enter a string value. Press Enter for the default ("").
- Тут снова вводим
enter:
root_folder_id>
Service Account Credentials JSON file path
Leave blank normally.
Needed only if you want use SA instead of interactive login.

Leading `~` will be expanded in the file name as will environment variables such as `${RCLONE_CONFIG_DIR}`.

Enter a string value. Press Enter for the default ("").
- Далее, также
enter:
service_account_file>
Edit advanced config? (y/n)
y) Yes
n) No (default)
- Ввойти в настройки
n:
y/n> n
Remote config
Use auto config?
 * Say Y if not sure
 * Say N if you are working on a remote or headless machine
y) Yes (default)
n) No
- Используем автоконфигурацию, выбираем
y:
y/n> n
Remote config
Use auto config?
 * Say Y if not sure
 * Say N if you are working on a remote or headless machine
y) Yes (default)
n) No
y/n> y
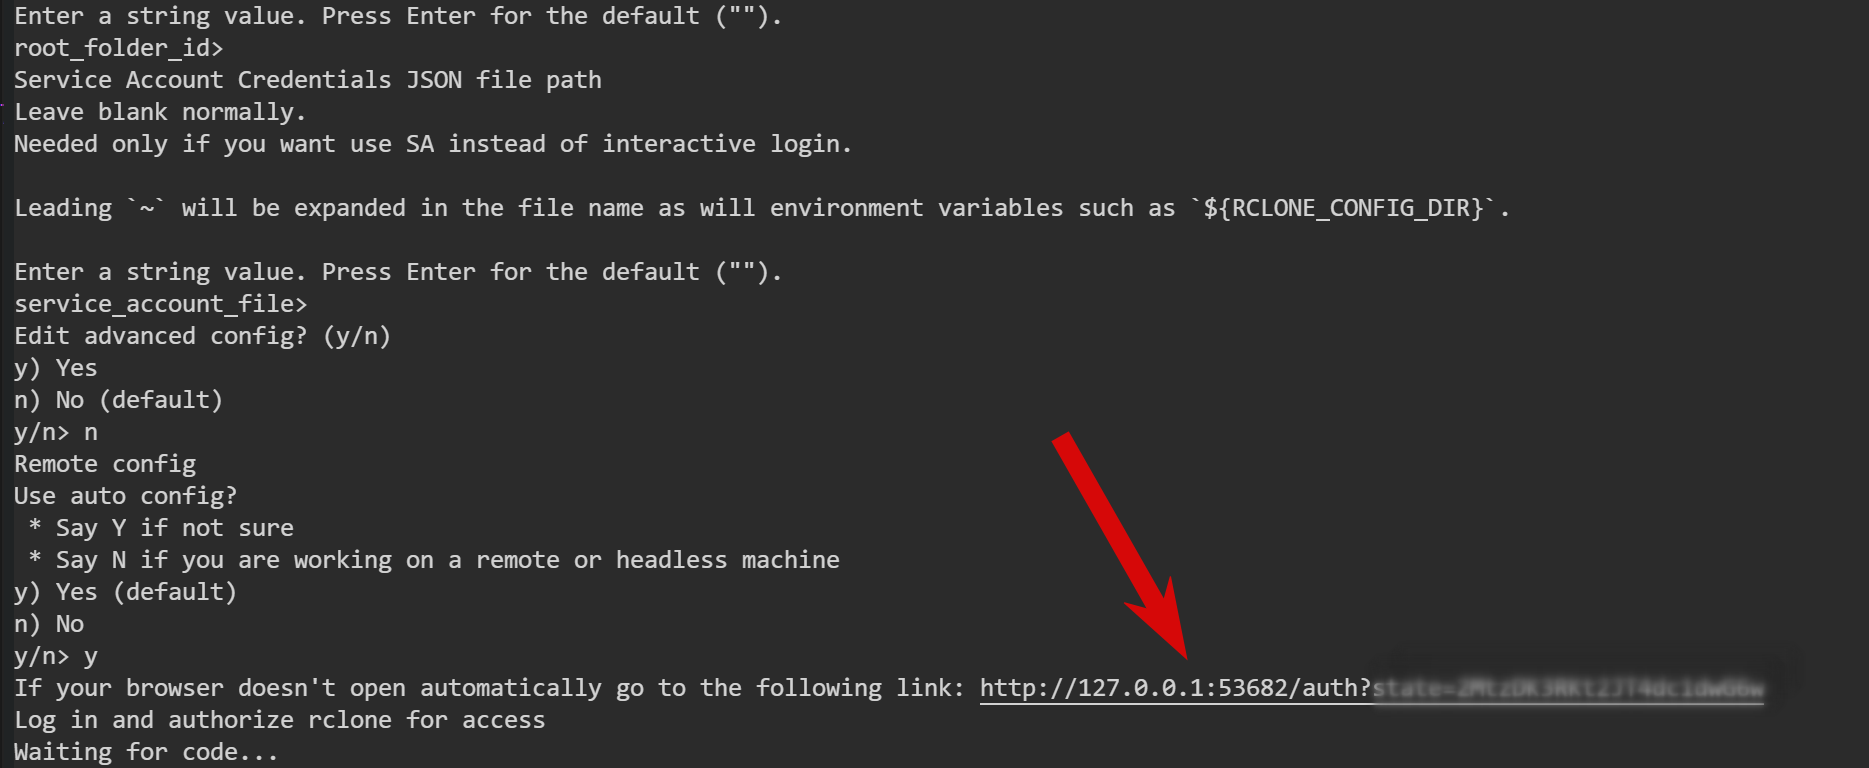
If your browser doesn't open automatically go to the following link: http://127.0.0.1:53682/auth?state=DADtzDKfasfaT4dc1dwG6w
Log in and authorize rclone for access
Waiting for code...
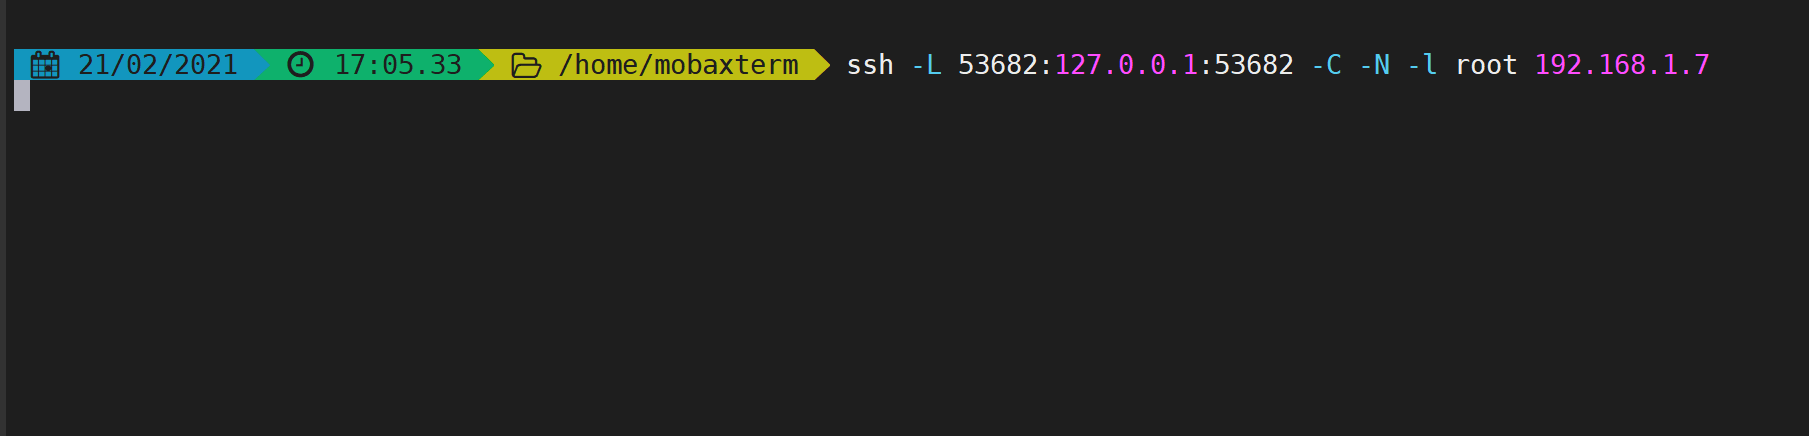
- Теперь нужно зайти с клиента, на сервер по
ssh:
ssh -L 53682:127.0.0.1:53682 -C -N -l root 192.168.1.7
192.168.1.7это IP сервера в локальной сети.- Остальное стандартно.
- Далее возвращаемся в терминал сервера, жмем на ссылку в терминале:
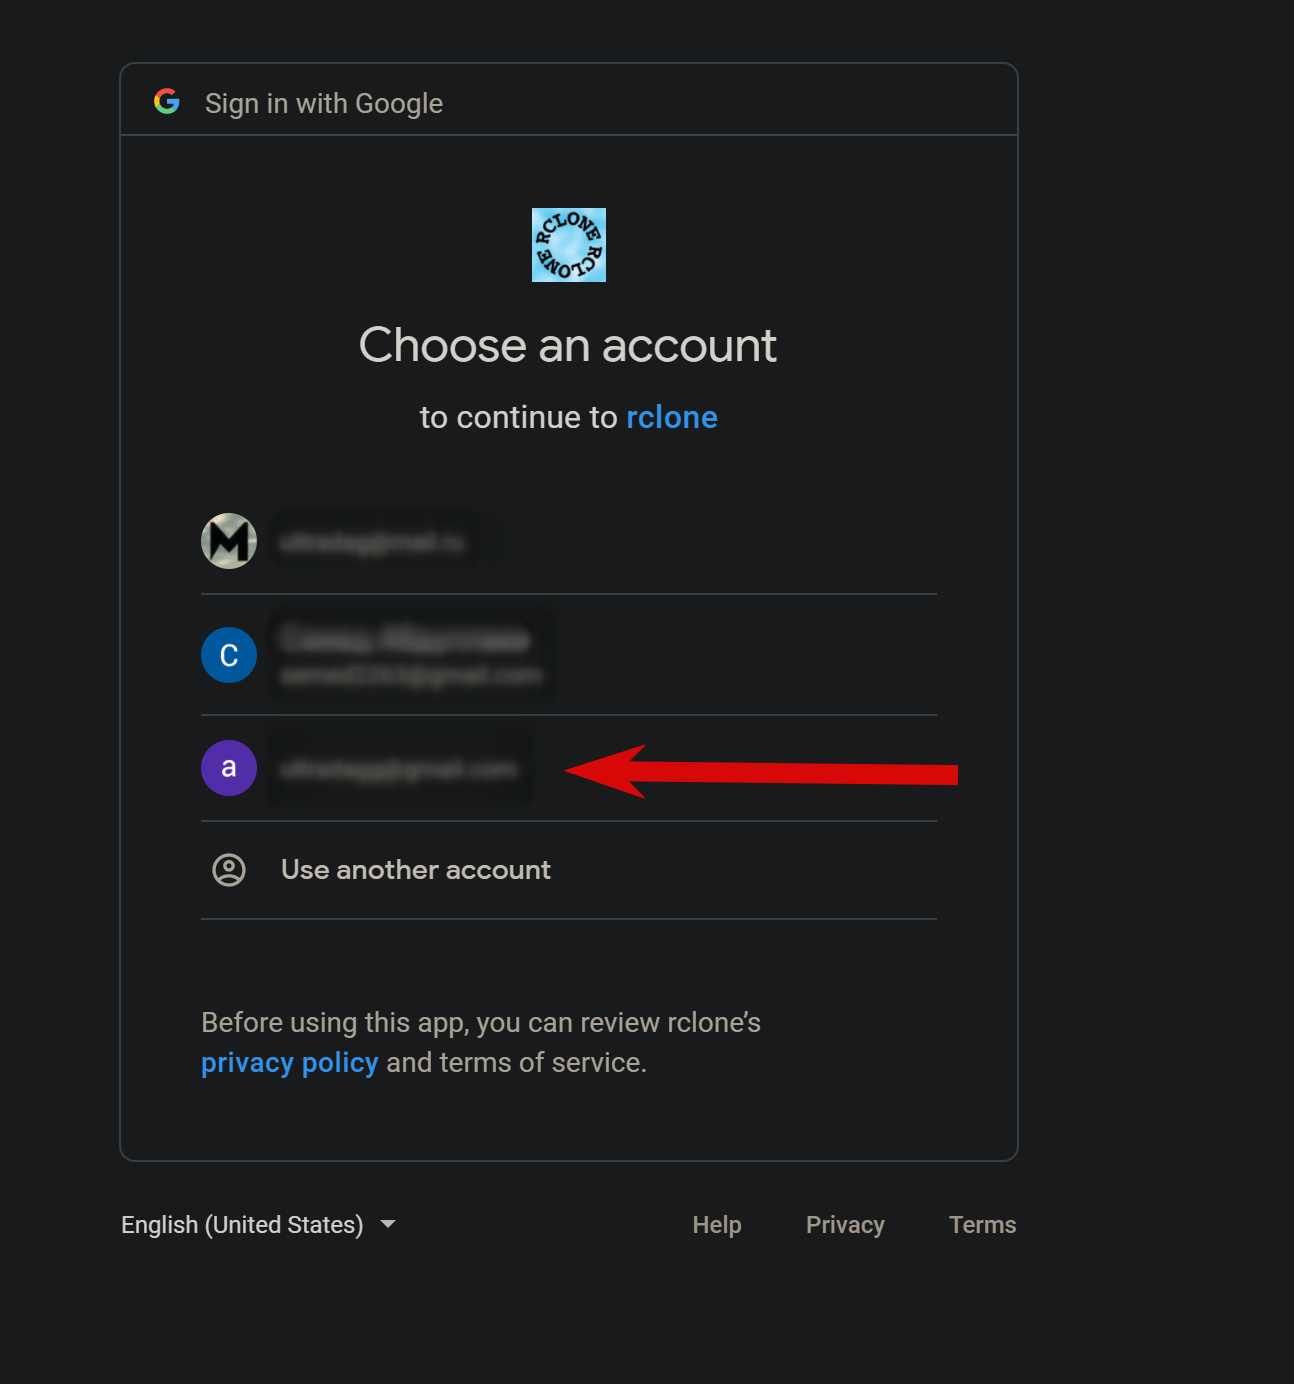
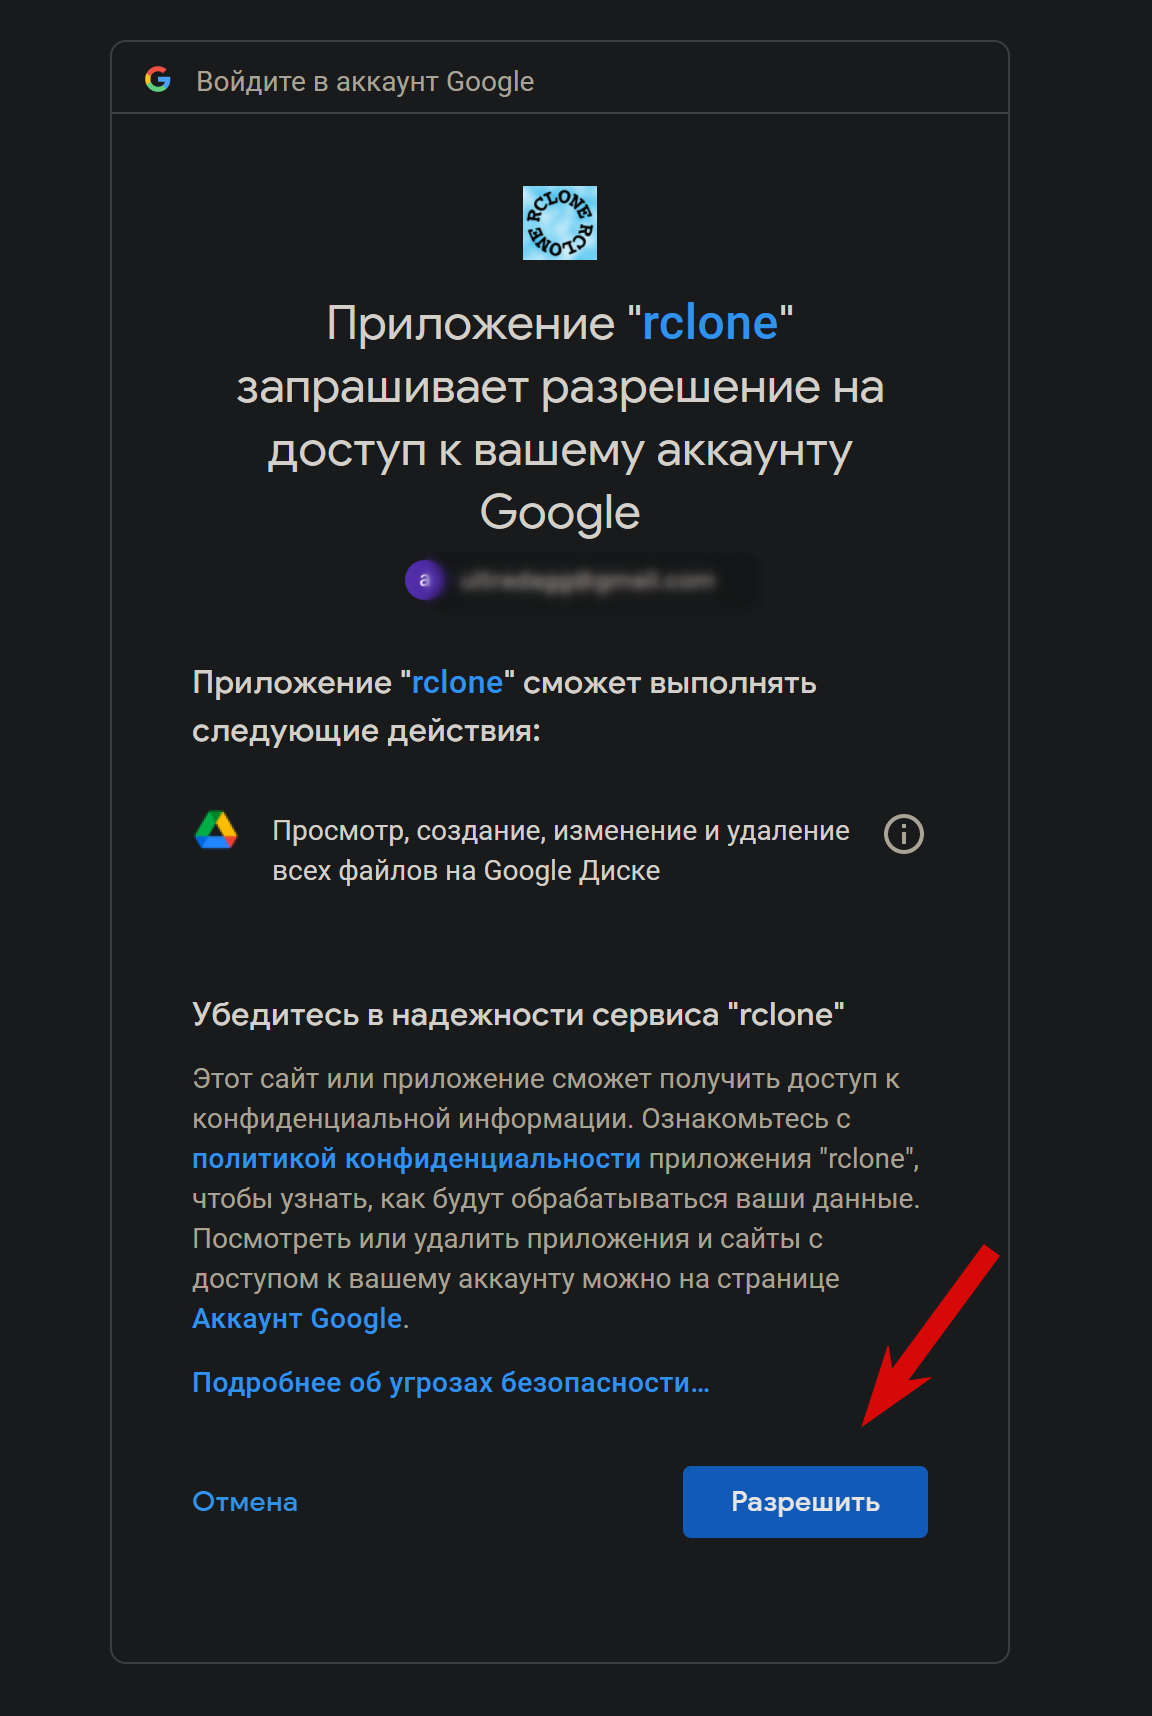
- Выбираем нужный аккаунт и подтверждаем доступ для
rclone:
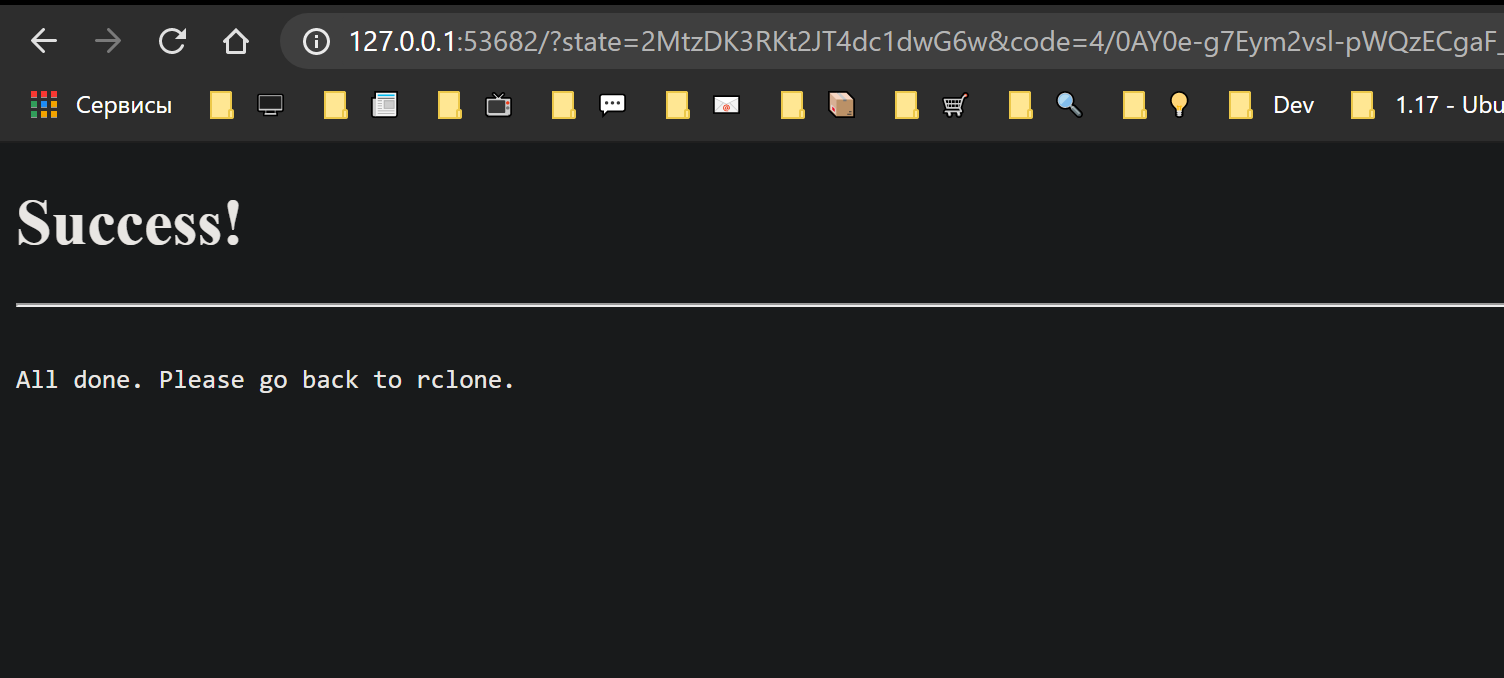
- Все ок:
- Снова, возвращаемся к терминалу сервера. Говорим, что это для личного пользования, то есть
n:
y/n> n
--------------------
[google_drive]
type = drive
scope = drive
token = {"access_token":"ya45.A0dsaddasdUrJRg7_I4Z8vxvasdafQR1u7Zry_qPurIC0VWDDr_7V1bCQQBgX2heMSDUgfwMNlO2lrotzSDSRgdasKEhCQ_E3d2fOaS8Wd_nr_UHsVIIvjgda0dasdYNA3Xe341C","token_type":"Bearer","refresh_token":"1//0cnE9vG0adasddasAGAwSNwF-L9IrEwdasdPOJUDr_c4oHMa8ZZzyyZtGlWdasd5pXxWUQvQ","expiry":"2021-02-21T18:06:09.293151575+03:00"}
--------------------
y) Yes this is OK (default)
e) Edit this remote
d) Delete this remote
- Получили
TOKEN, далее, сохраняем настройки и это подключение:
y/e/d> y
Current remotes:

Name                 Type
====                 ====
google_drive      drive

e) Edit existing remote
n) New remote
d) Delete remote
r) Rename remote
c) Copy remote
s) Set configuration password
q) Quit config
- Видим в списке, свое новое подключение, теперь выходим из настроек
q:
e/n/d/r/c/s/q> q
- Создаем папку для сопоставлении при монтировании:
mkdir -p /mnt/disks/google_drive
- Далее команда
mount:
rclone mount --max-read-ahead 1024k --vfs-cache-mode full --allow-other google_drive: /mnt/disks/google_drive &
- На этом все. Проверяем подключение, и не забываем добавлять в
user scripts, дабы не терялсяmountпосле перезагрузки сервера.
RClone - Общие советы и информация.
Настроек у
RCloneочень много, персонально по Операционным системам, по Облачным хранилищам, тут лишь базовые вещи, которые использую сам. Полная информация в документации.
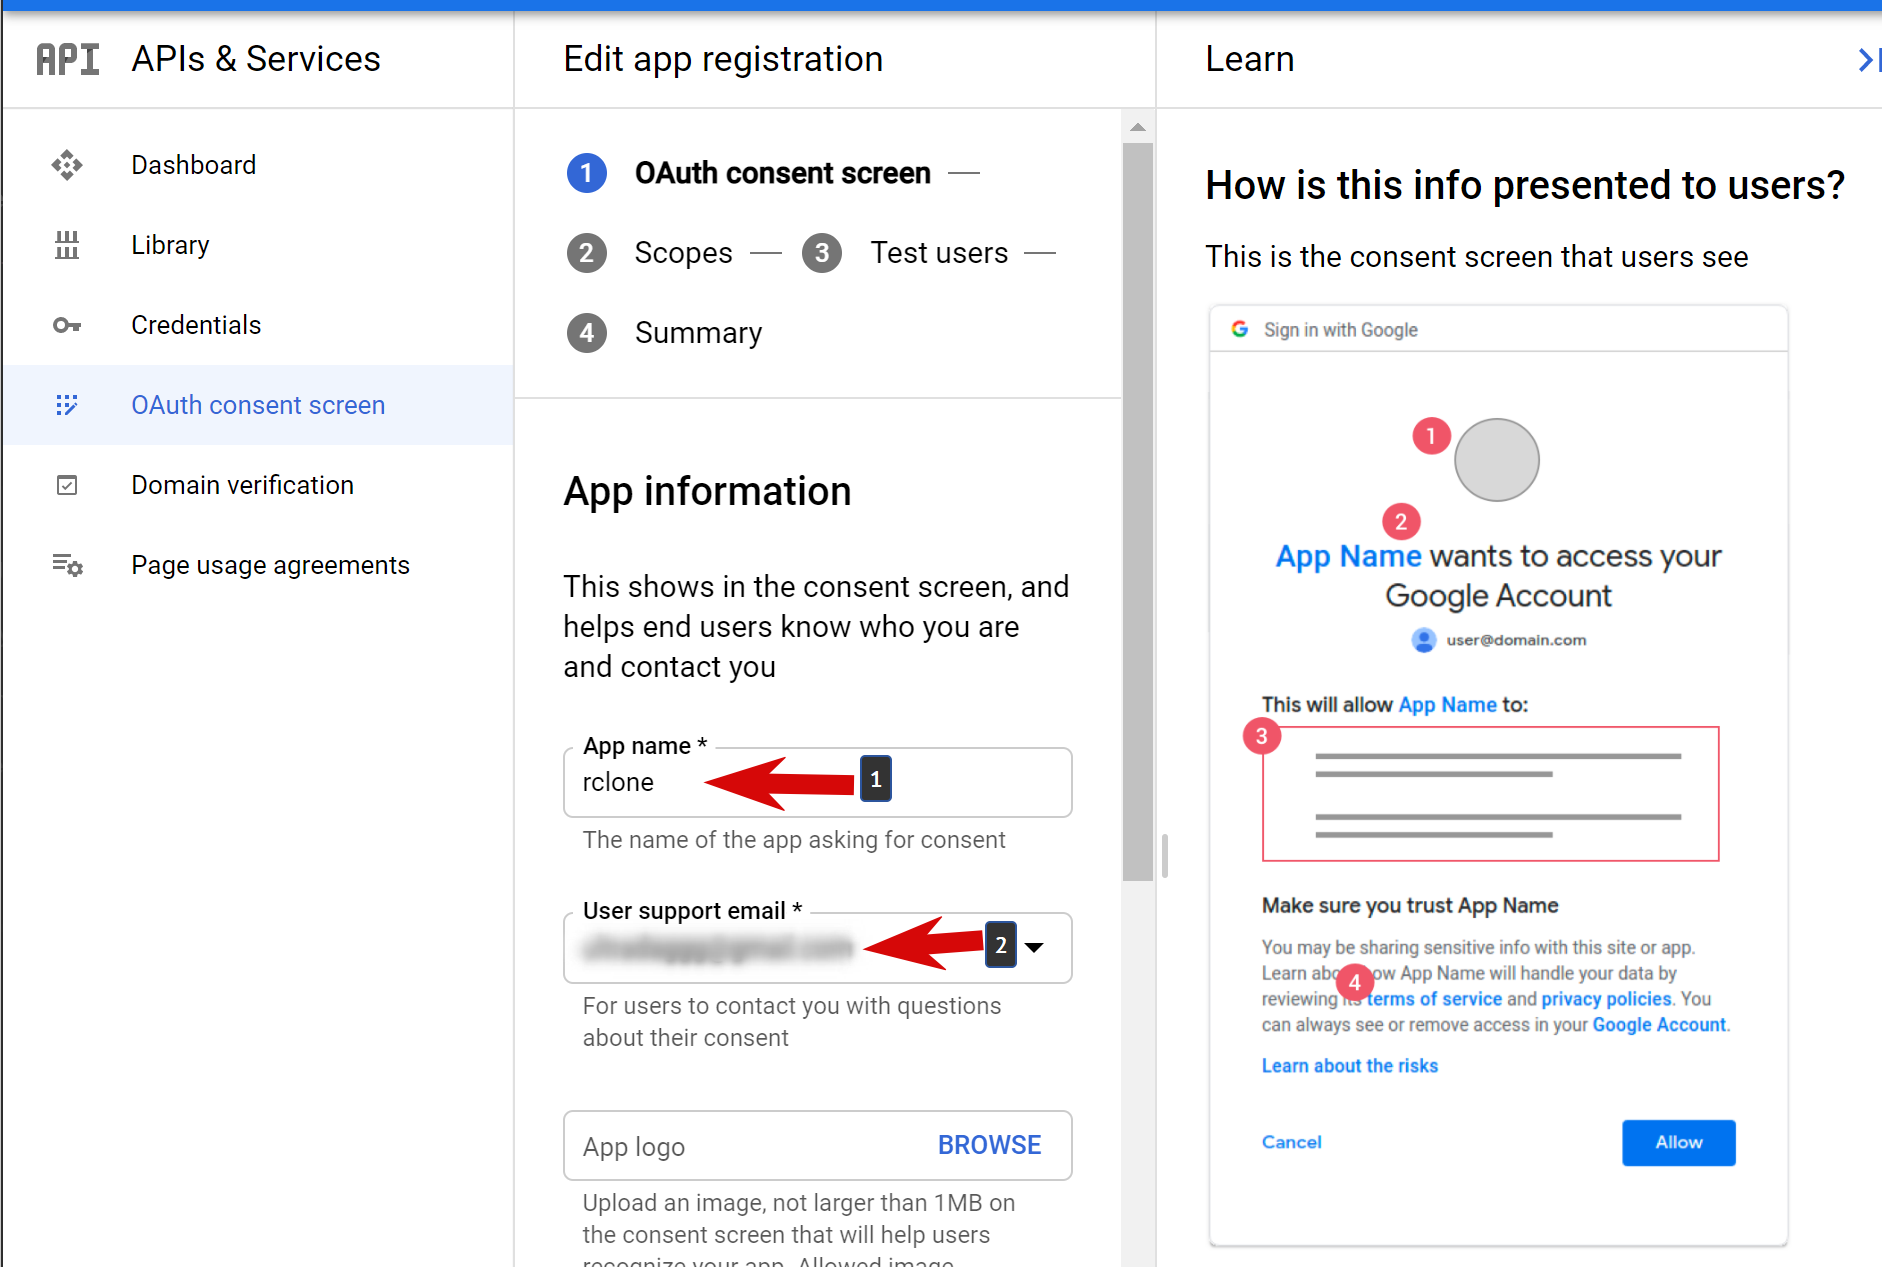
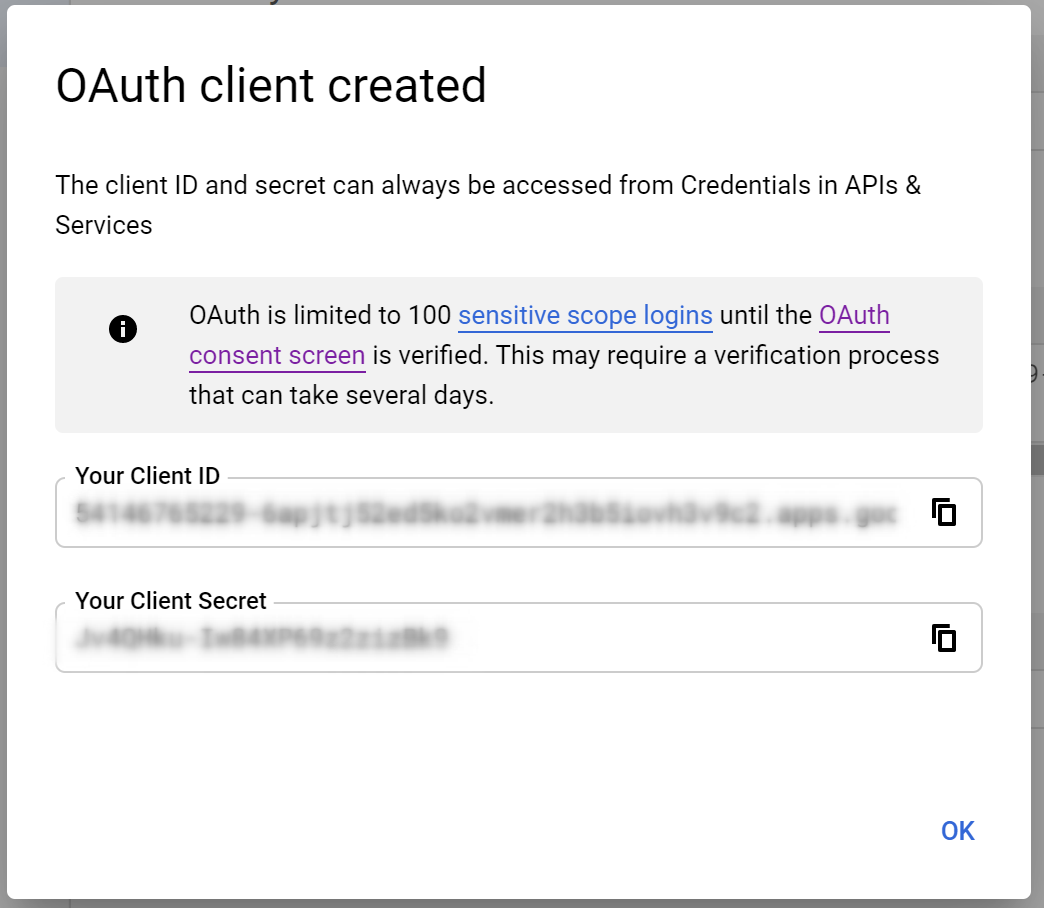
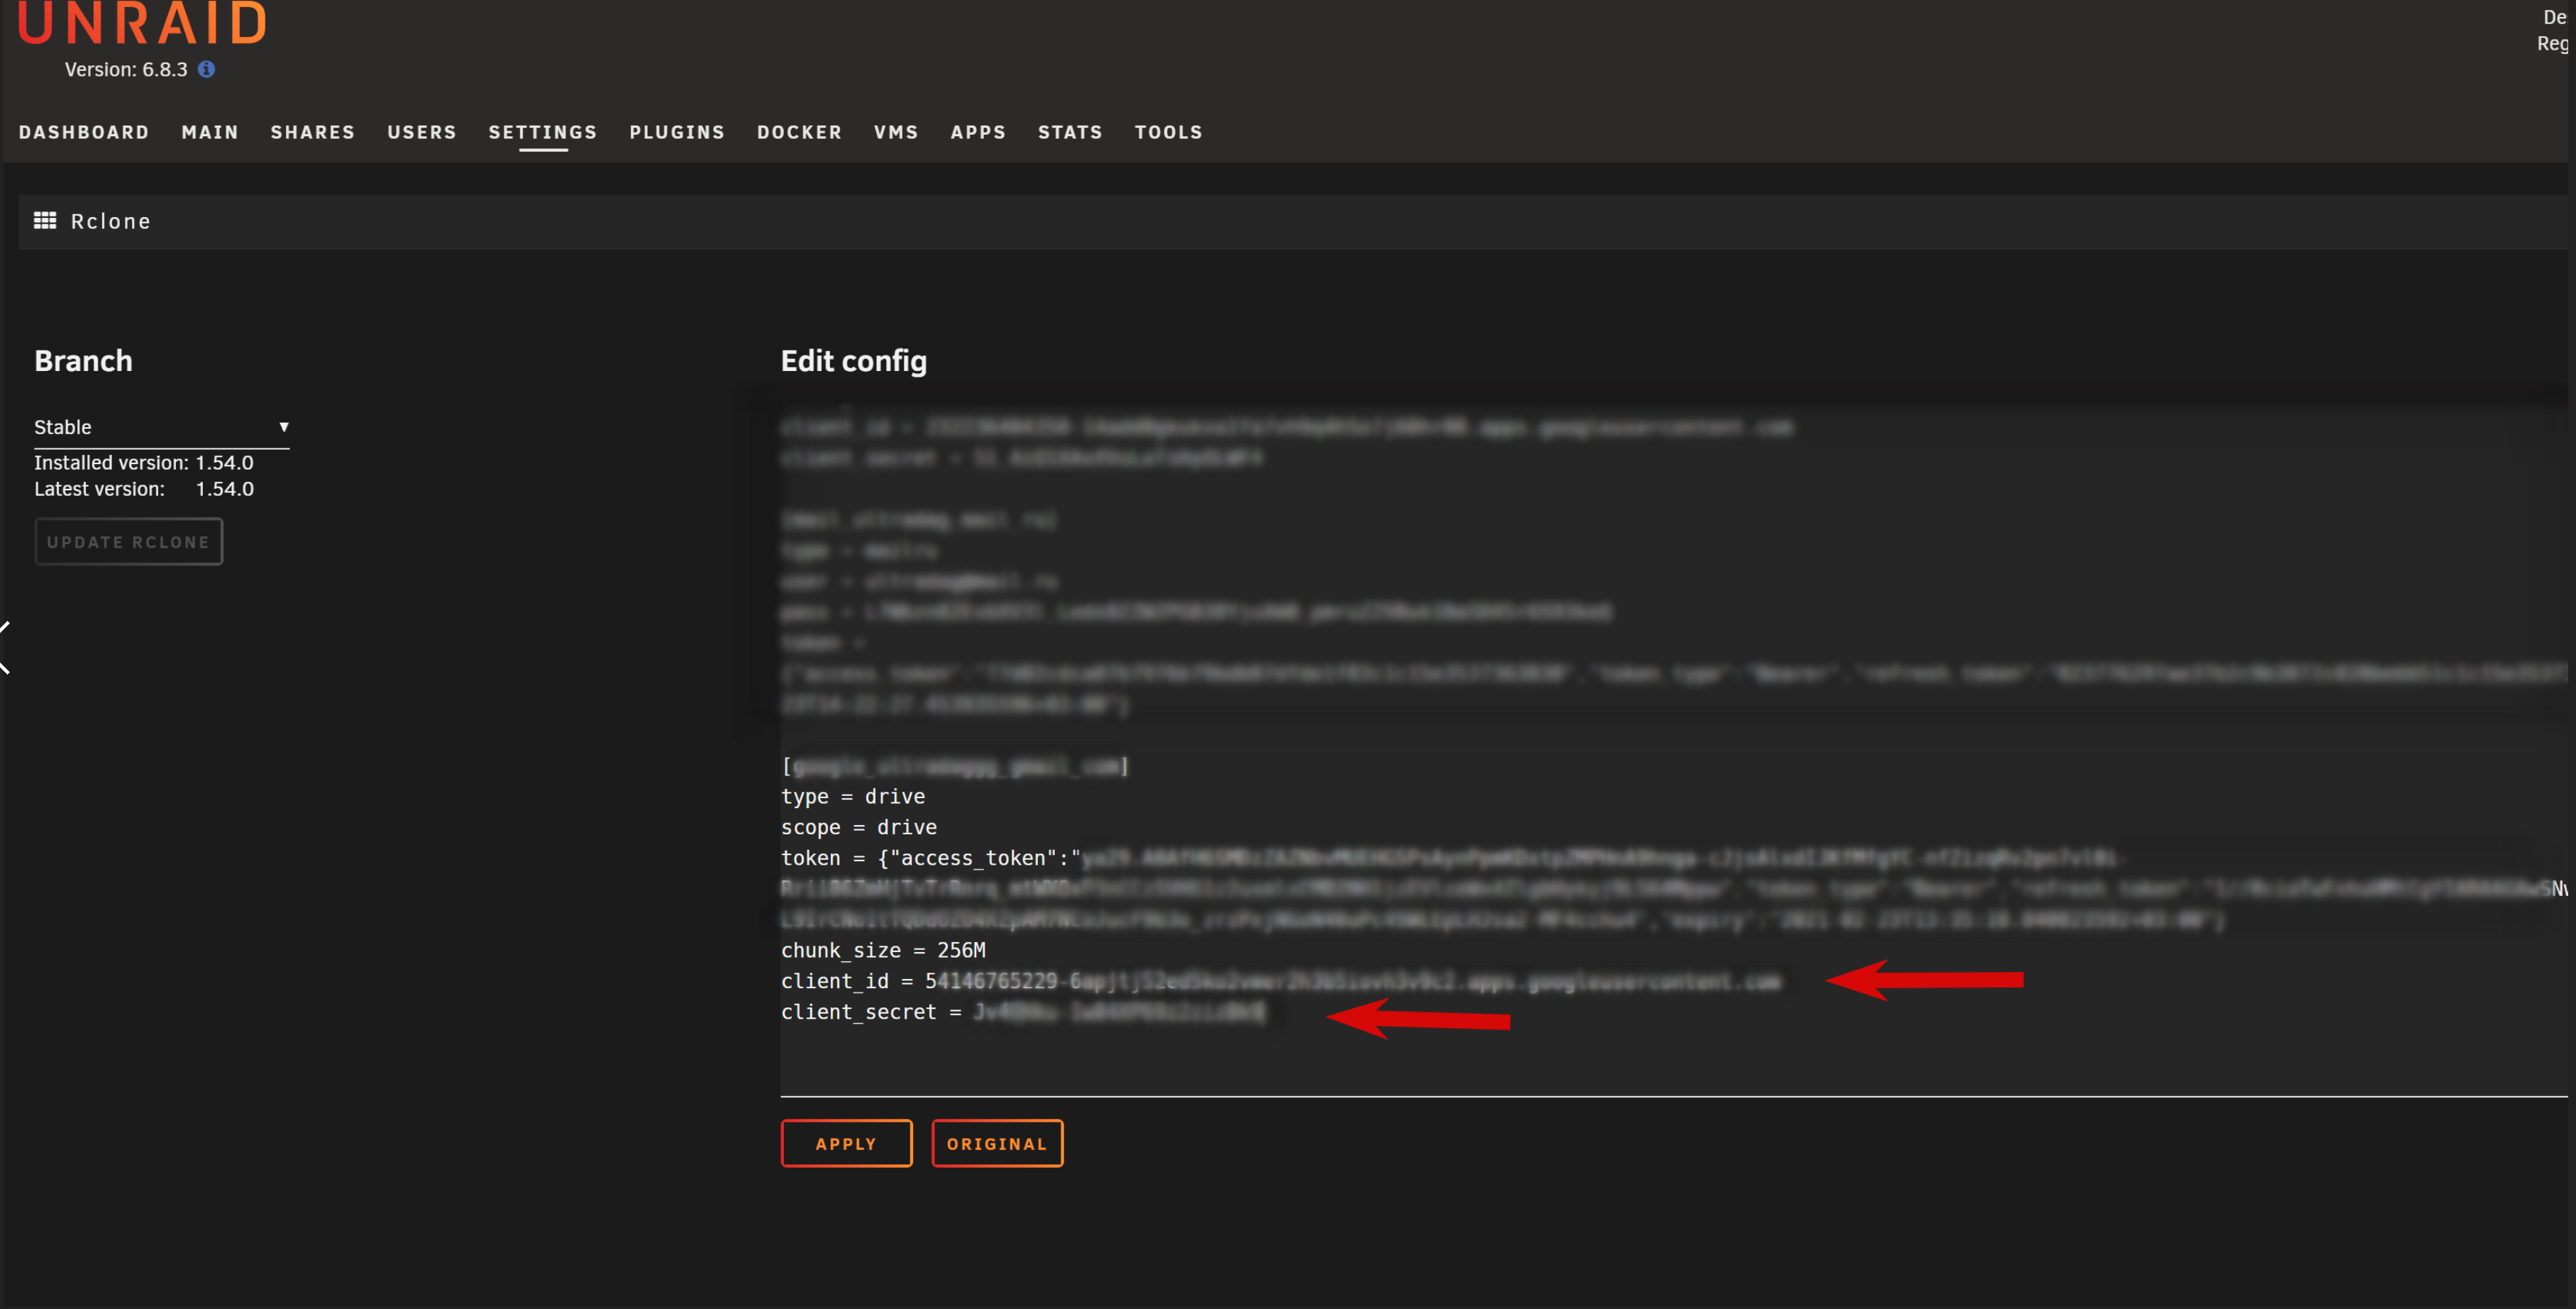
Google Drive - Создание собственного client_id
Когда вы используете
rcloneсrclone client_id. Он распределяется между всеми пользователямиrclone. Существует глобальный лимит скорости на количество запросов в секунду, которые может выполнять каждыйclient_id, установленный
Поэтому, настоятельно рекомендуется использовать свой собственный идентификатор клиента, так как по умолчанию установлен идентификаторrclone.
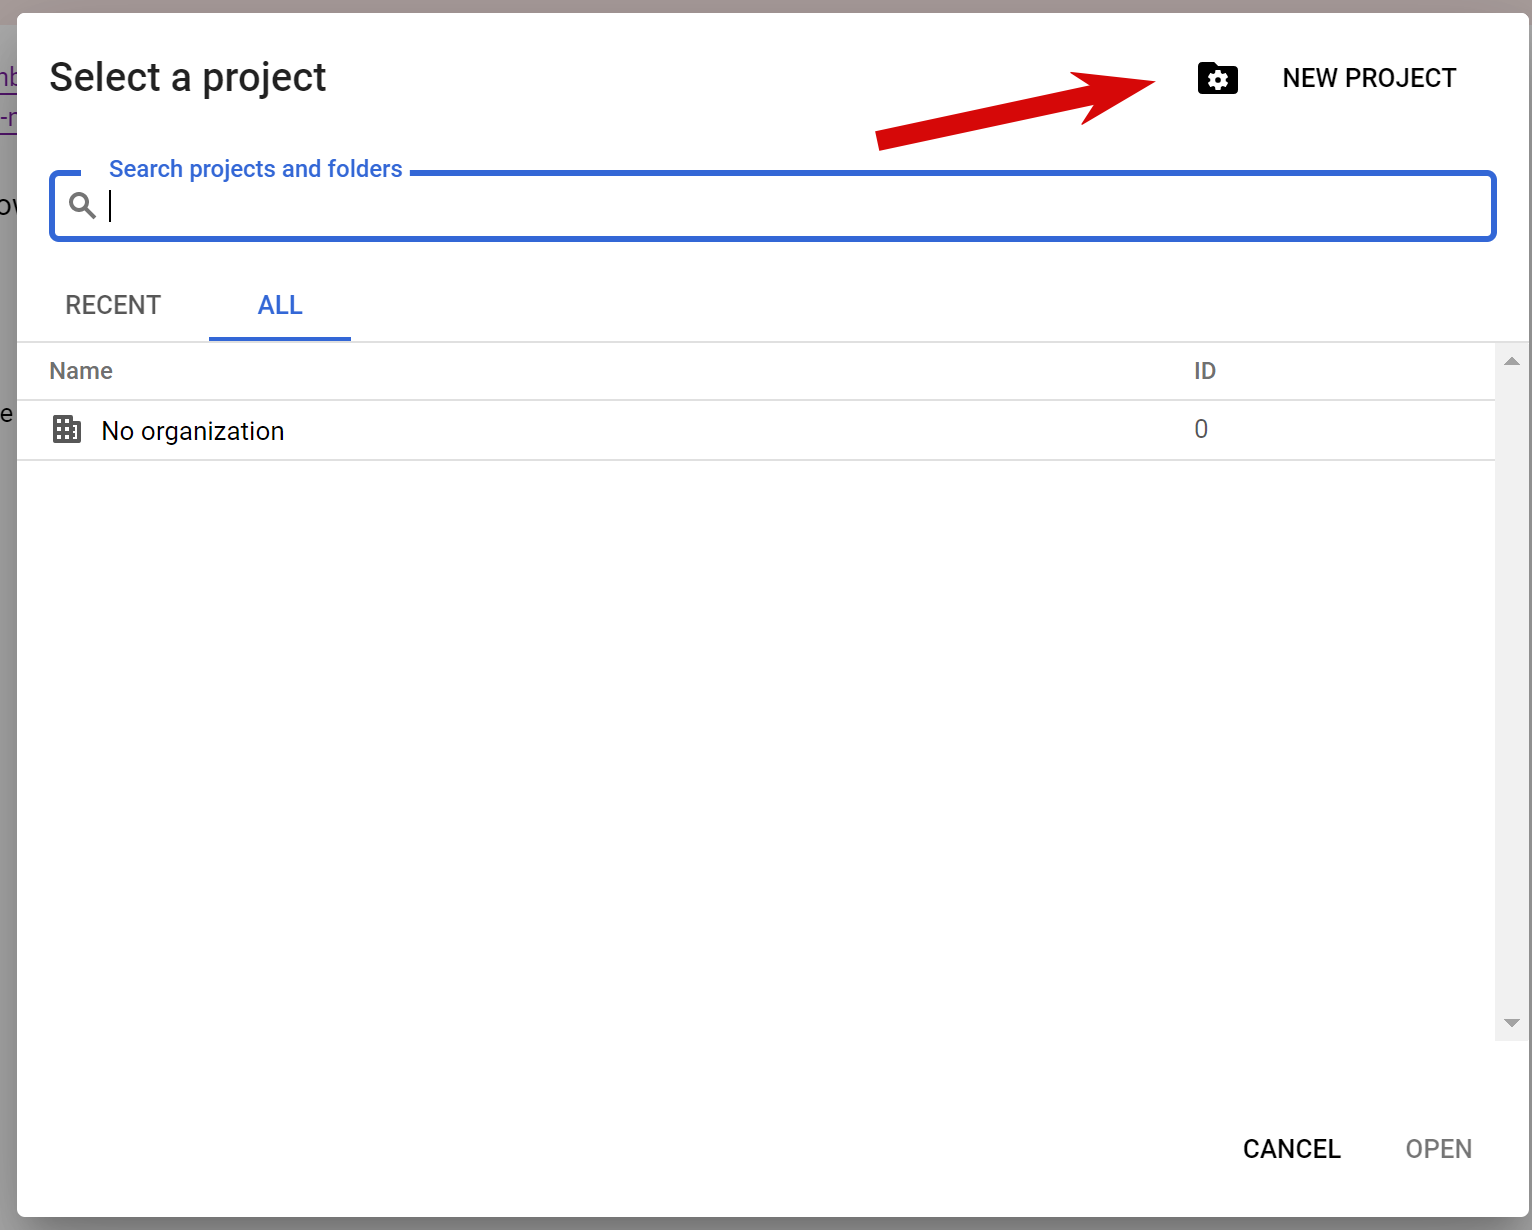
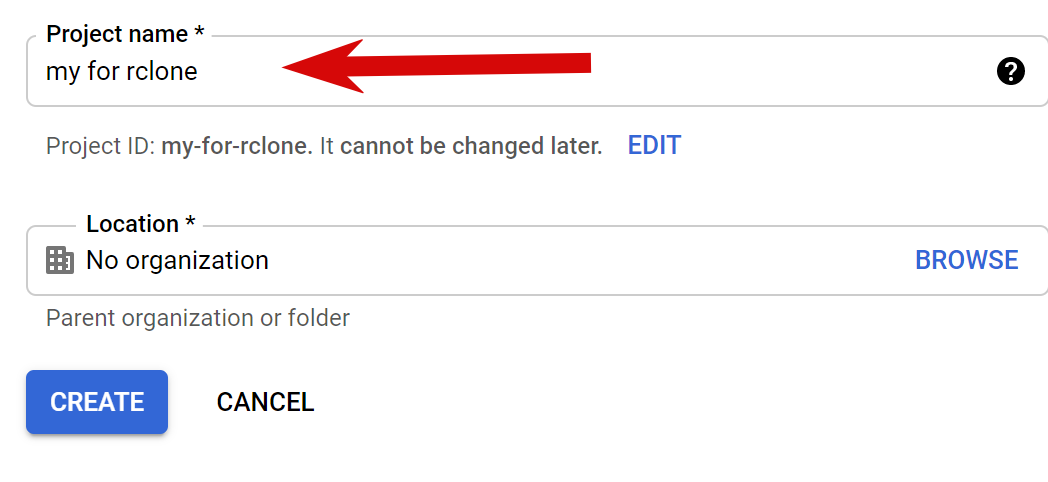
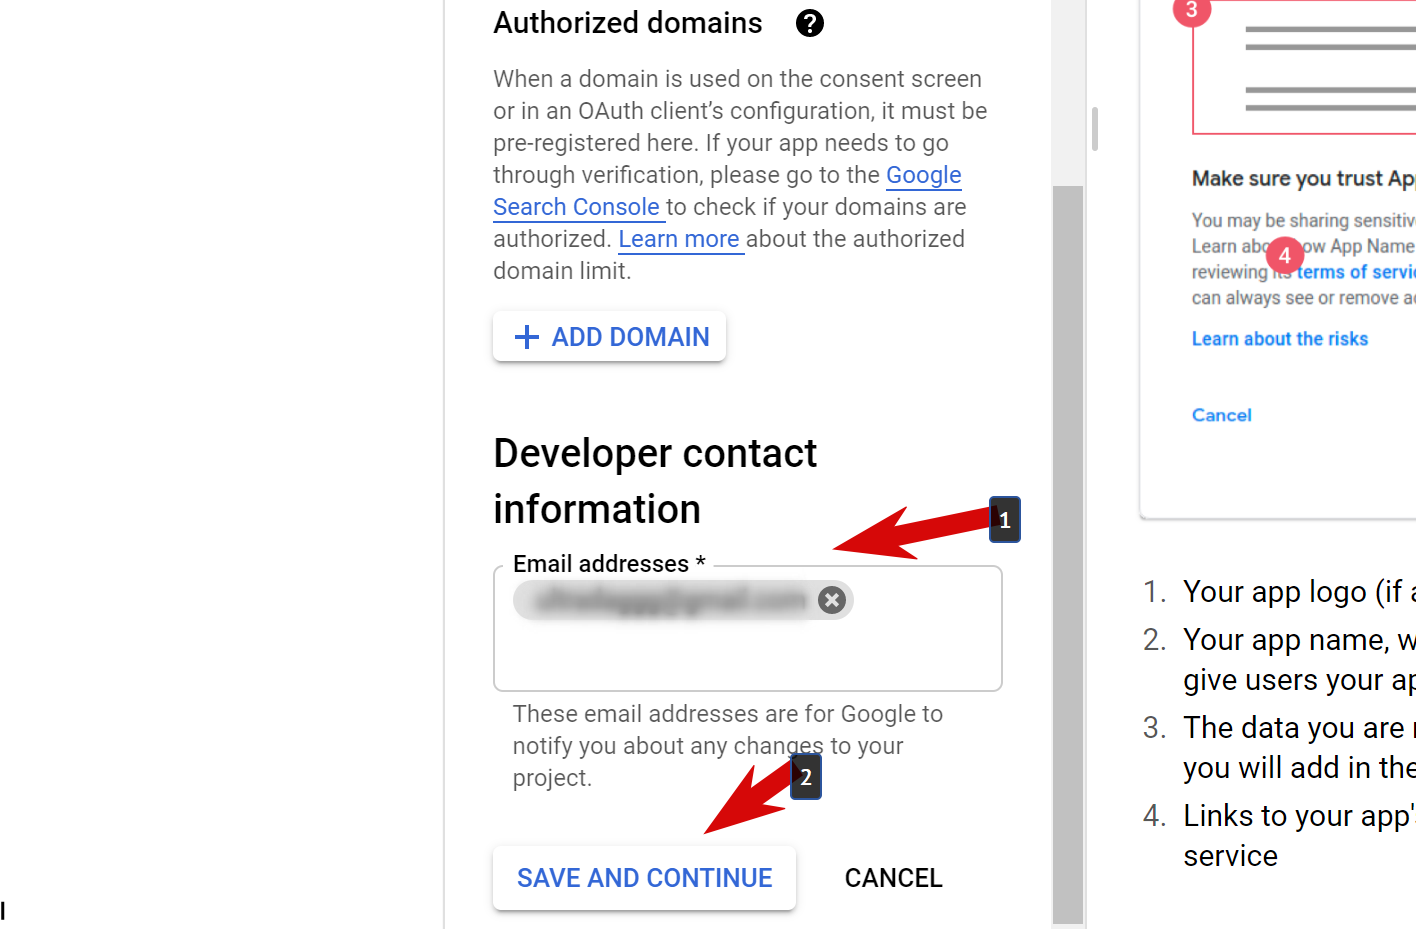
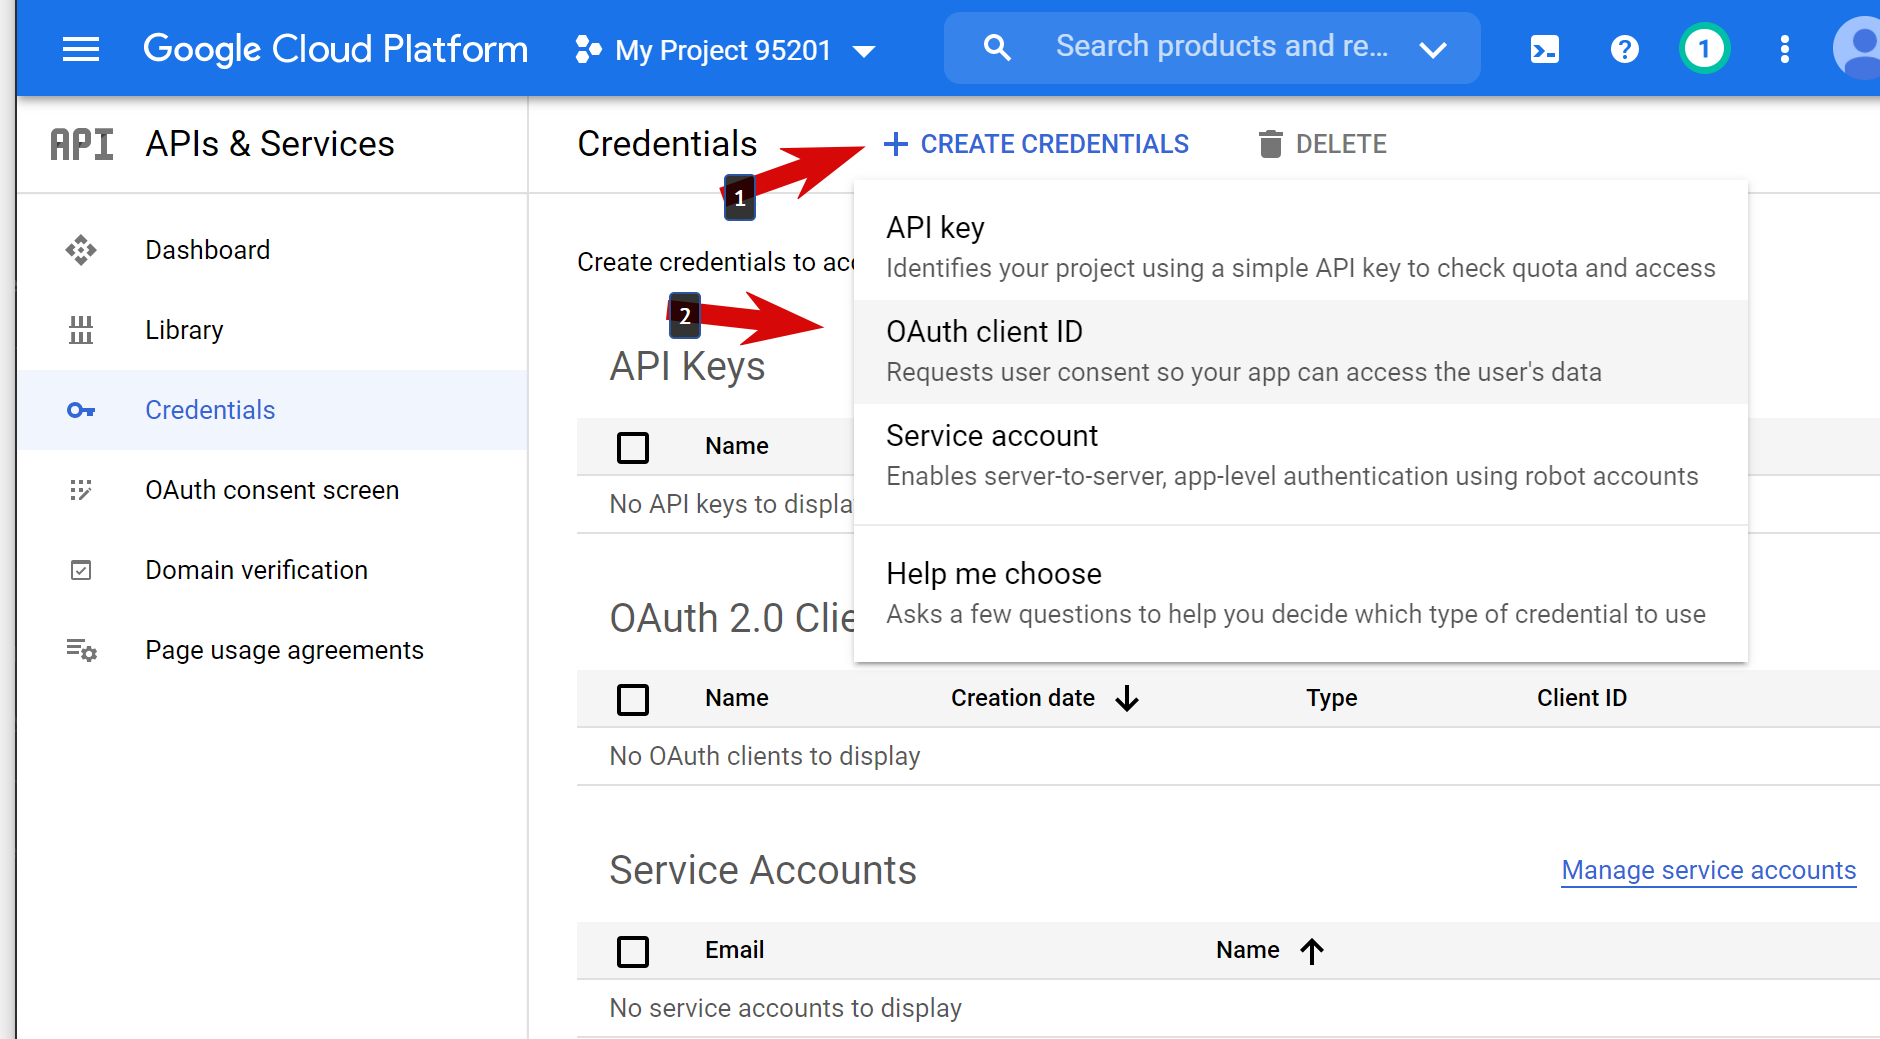
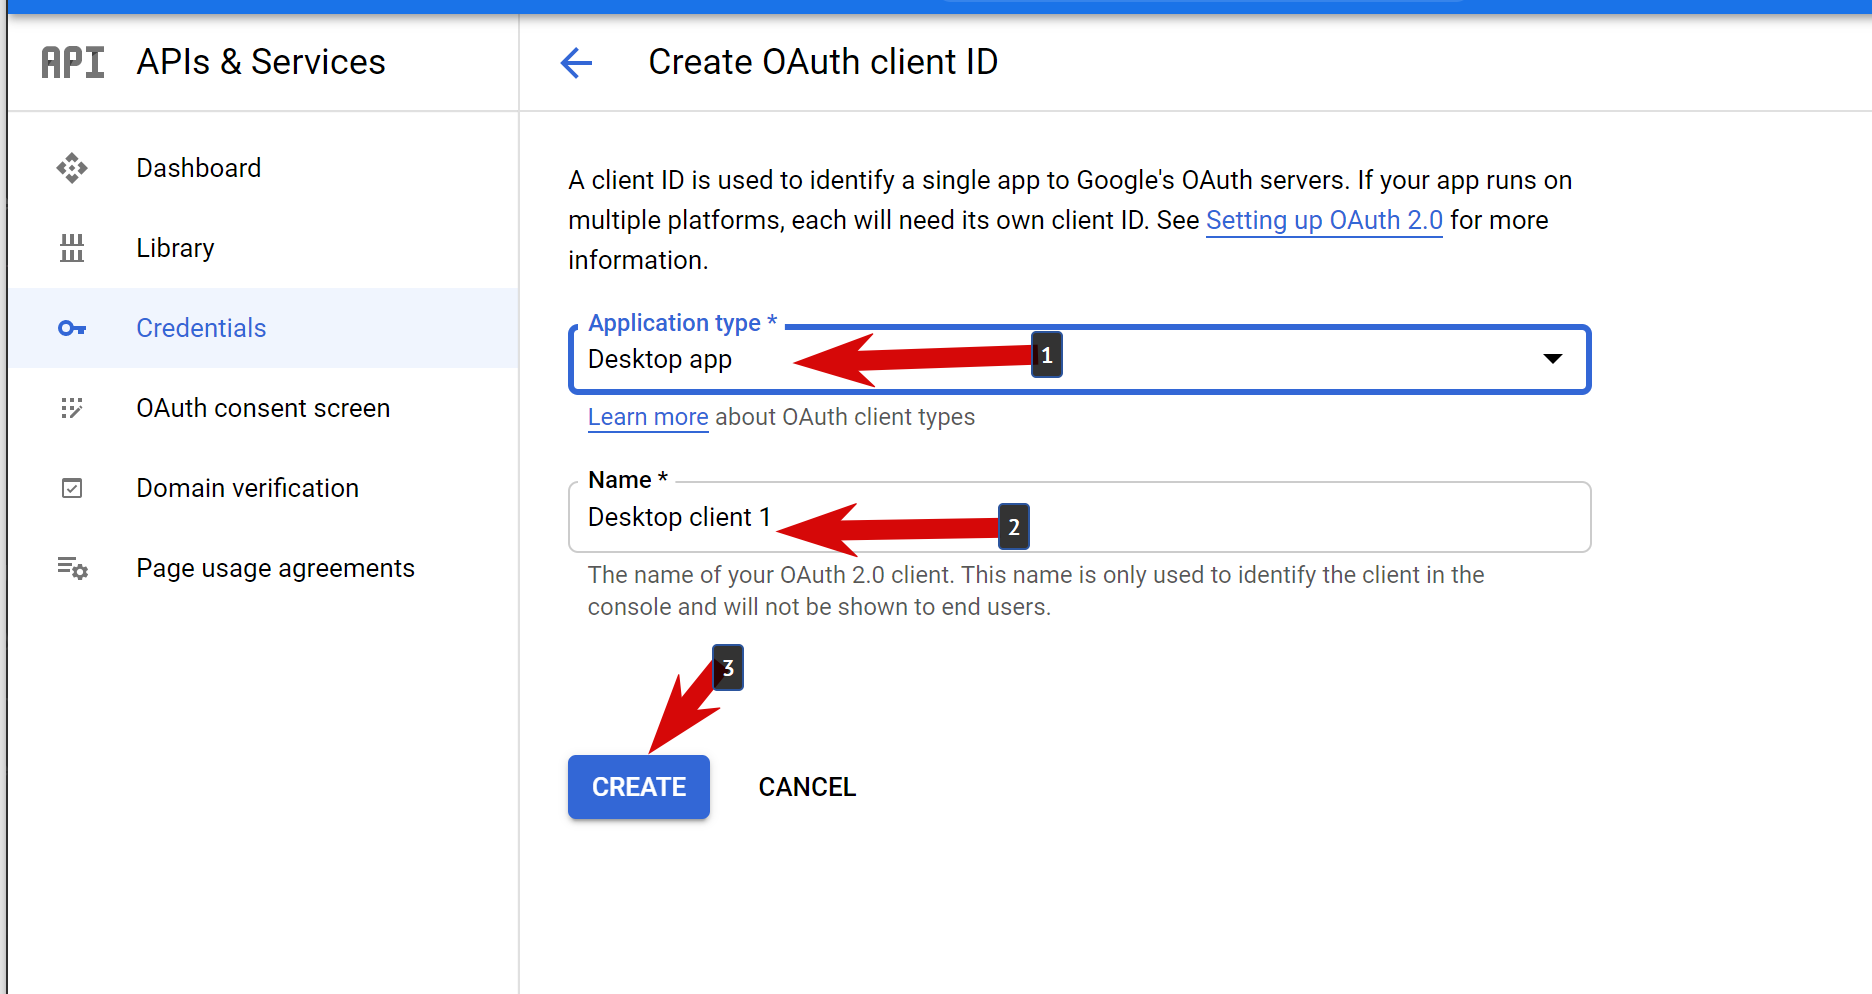
Регистрируем:
- Переходим по ссылке.

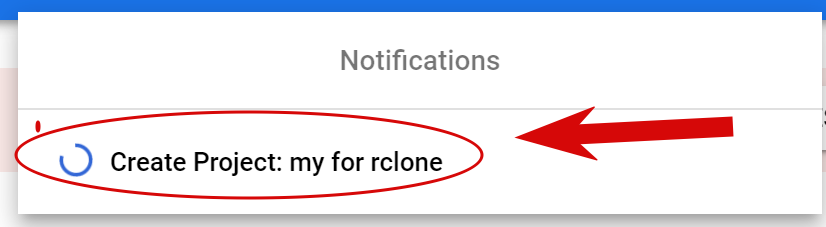
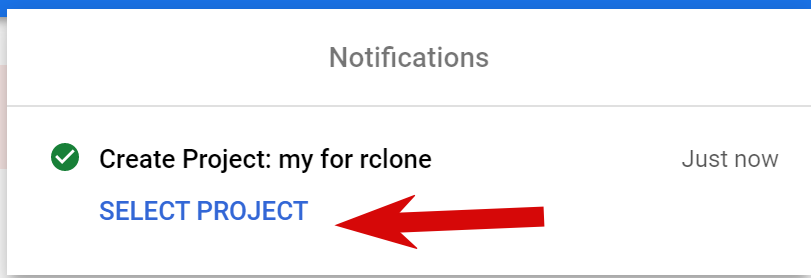
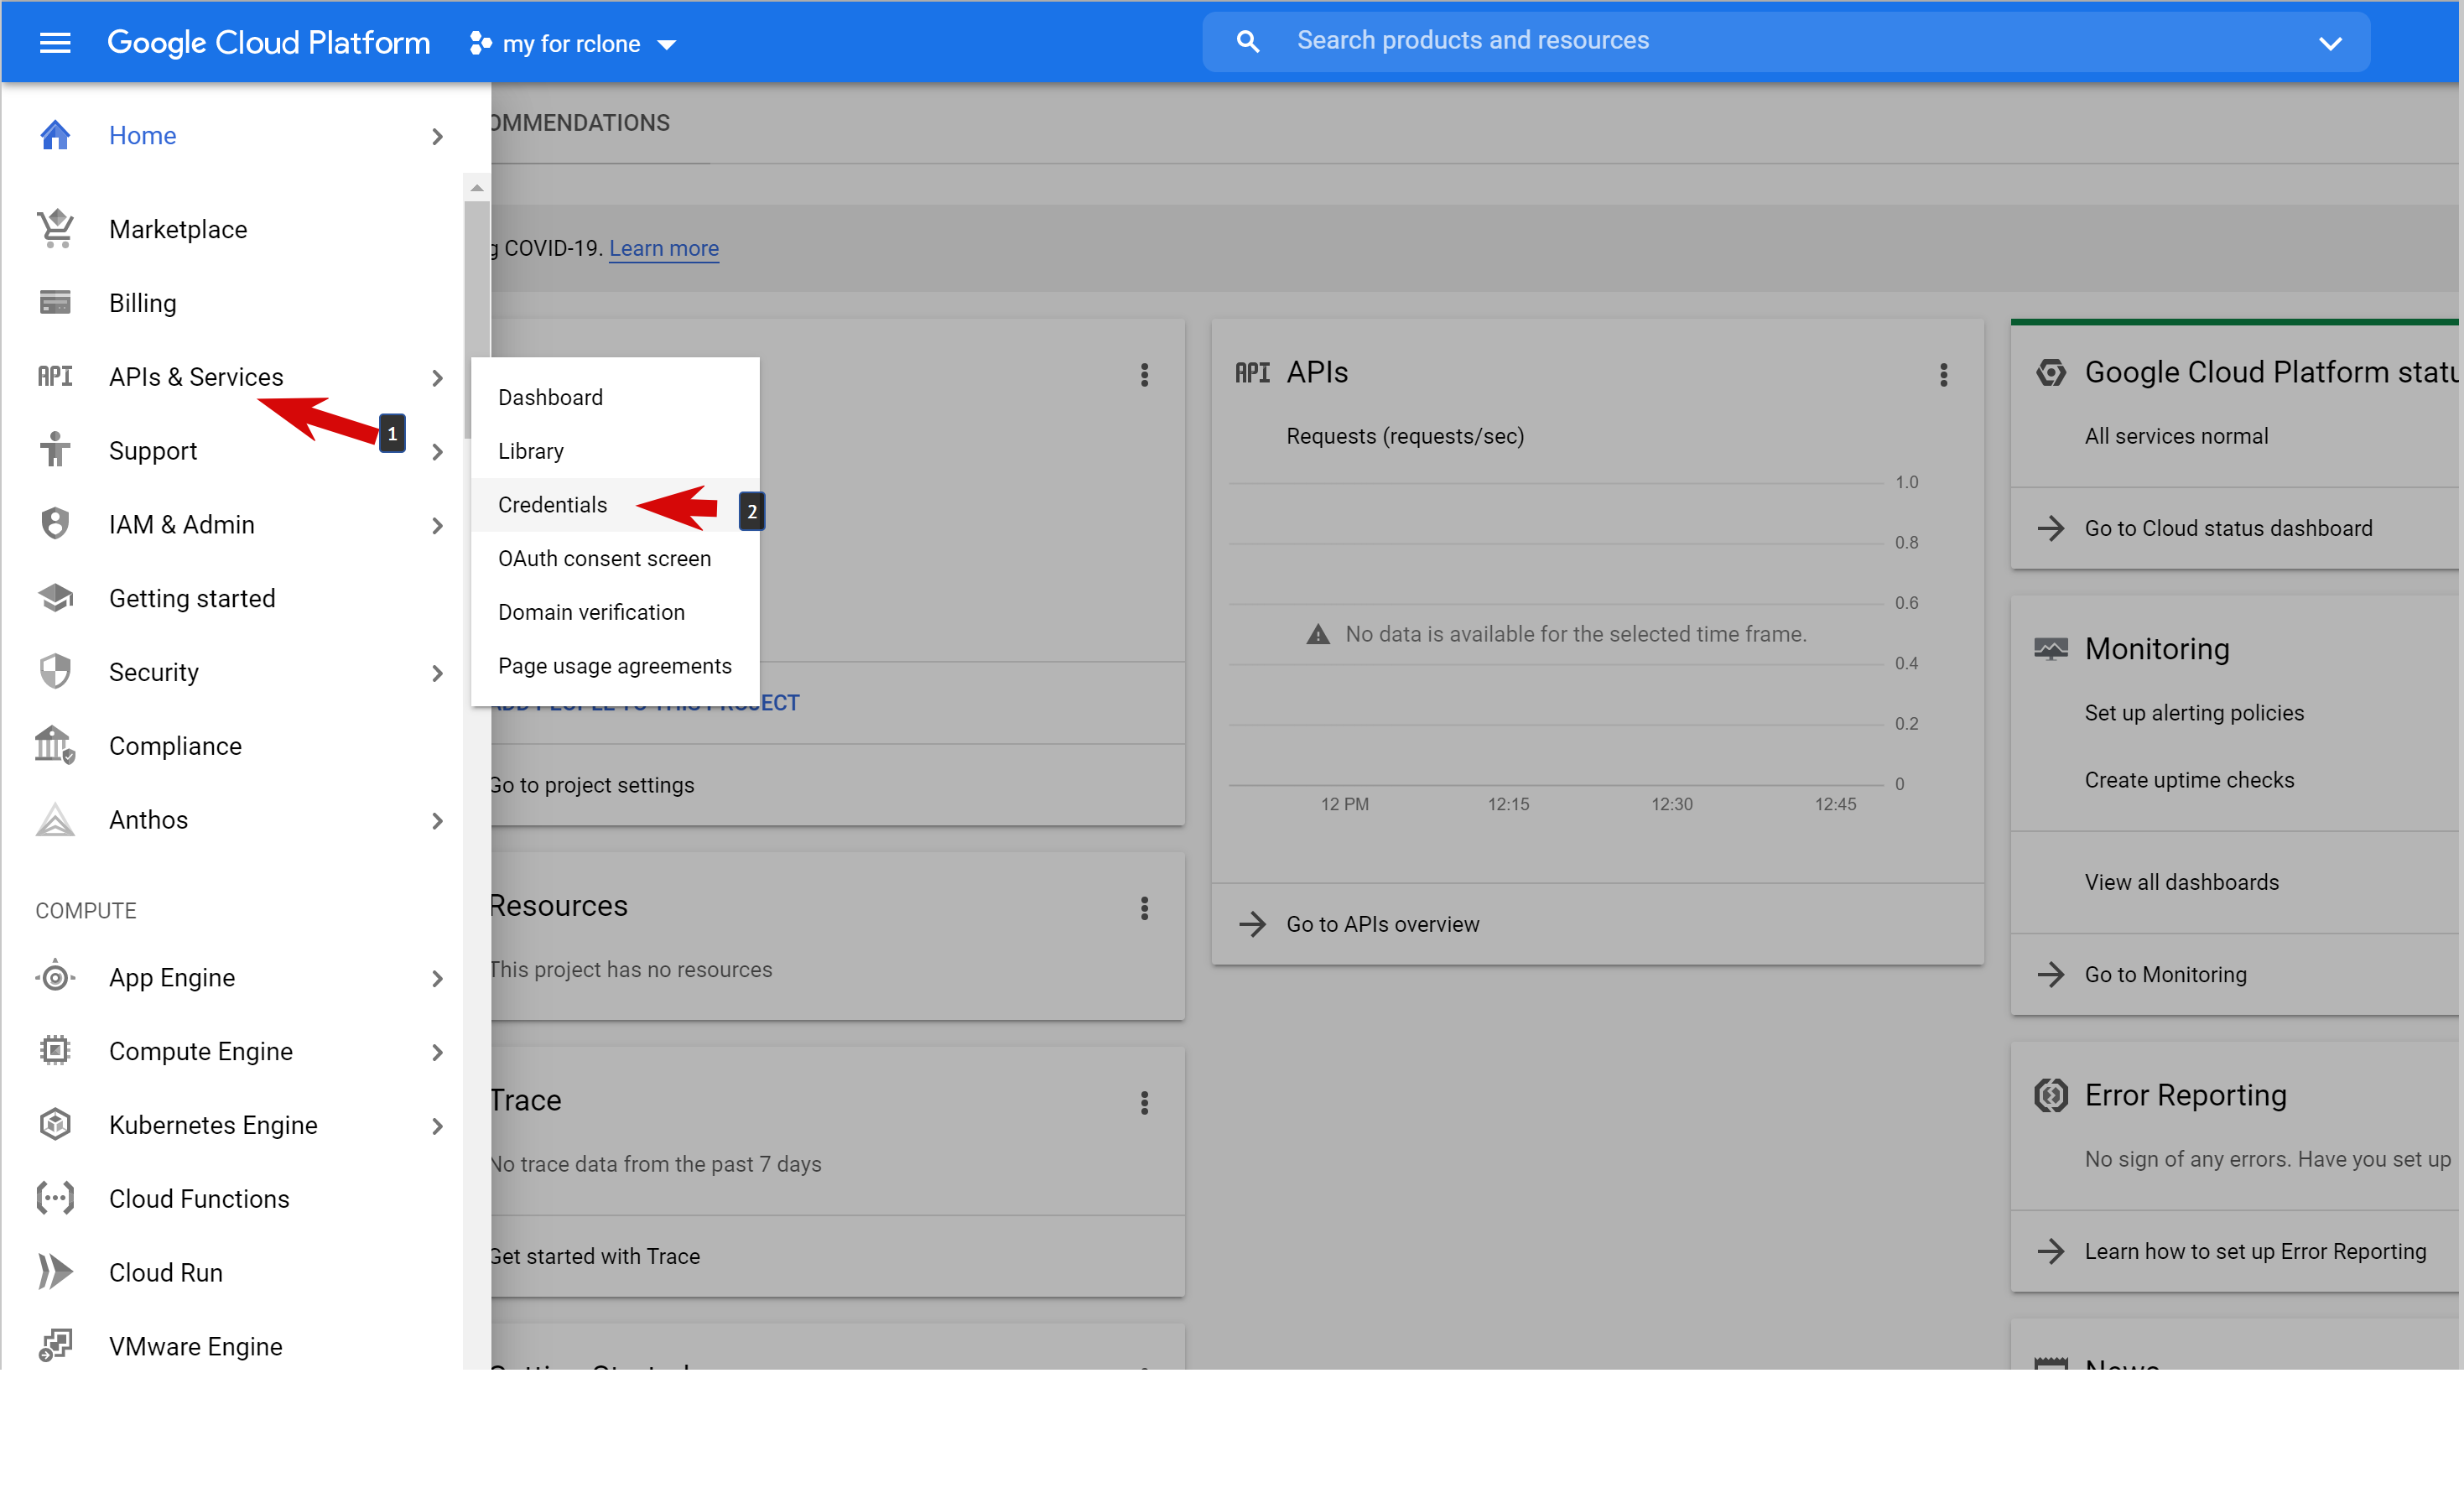
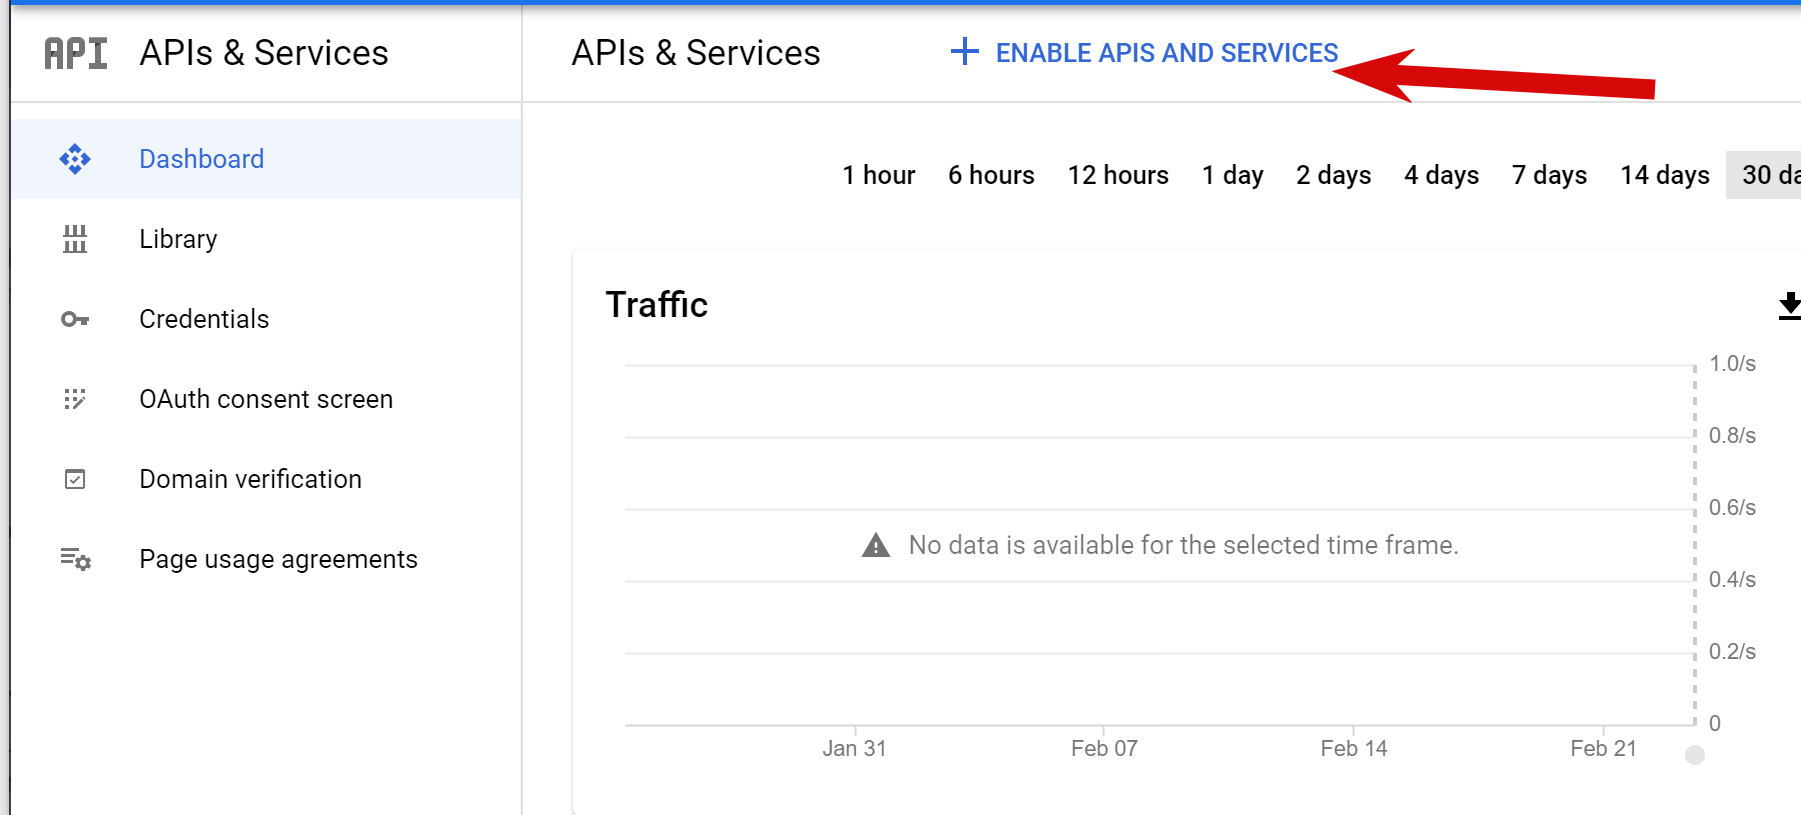
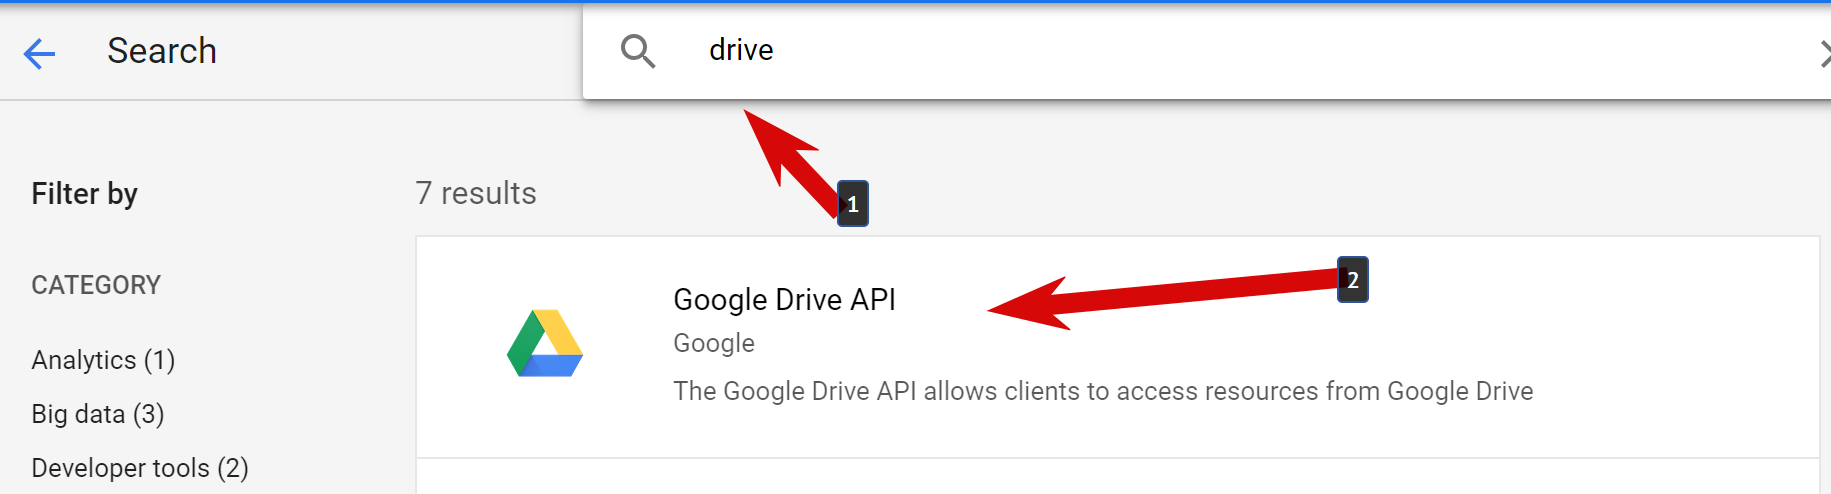
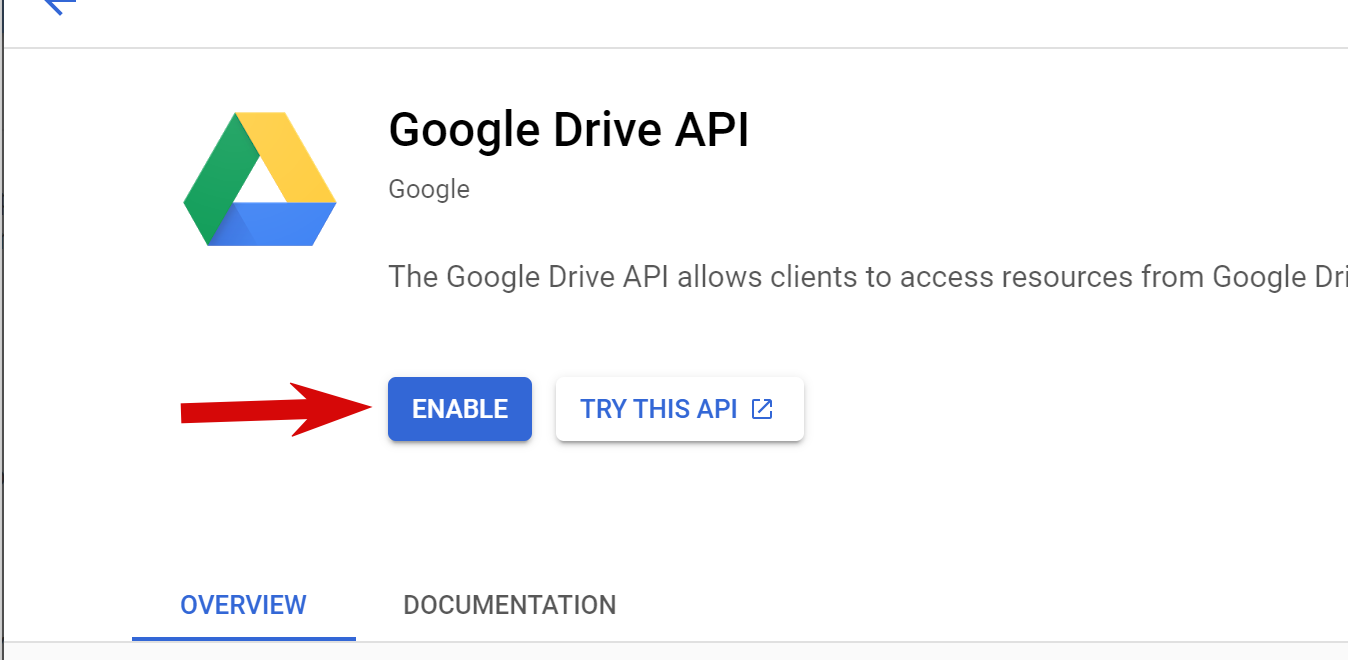
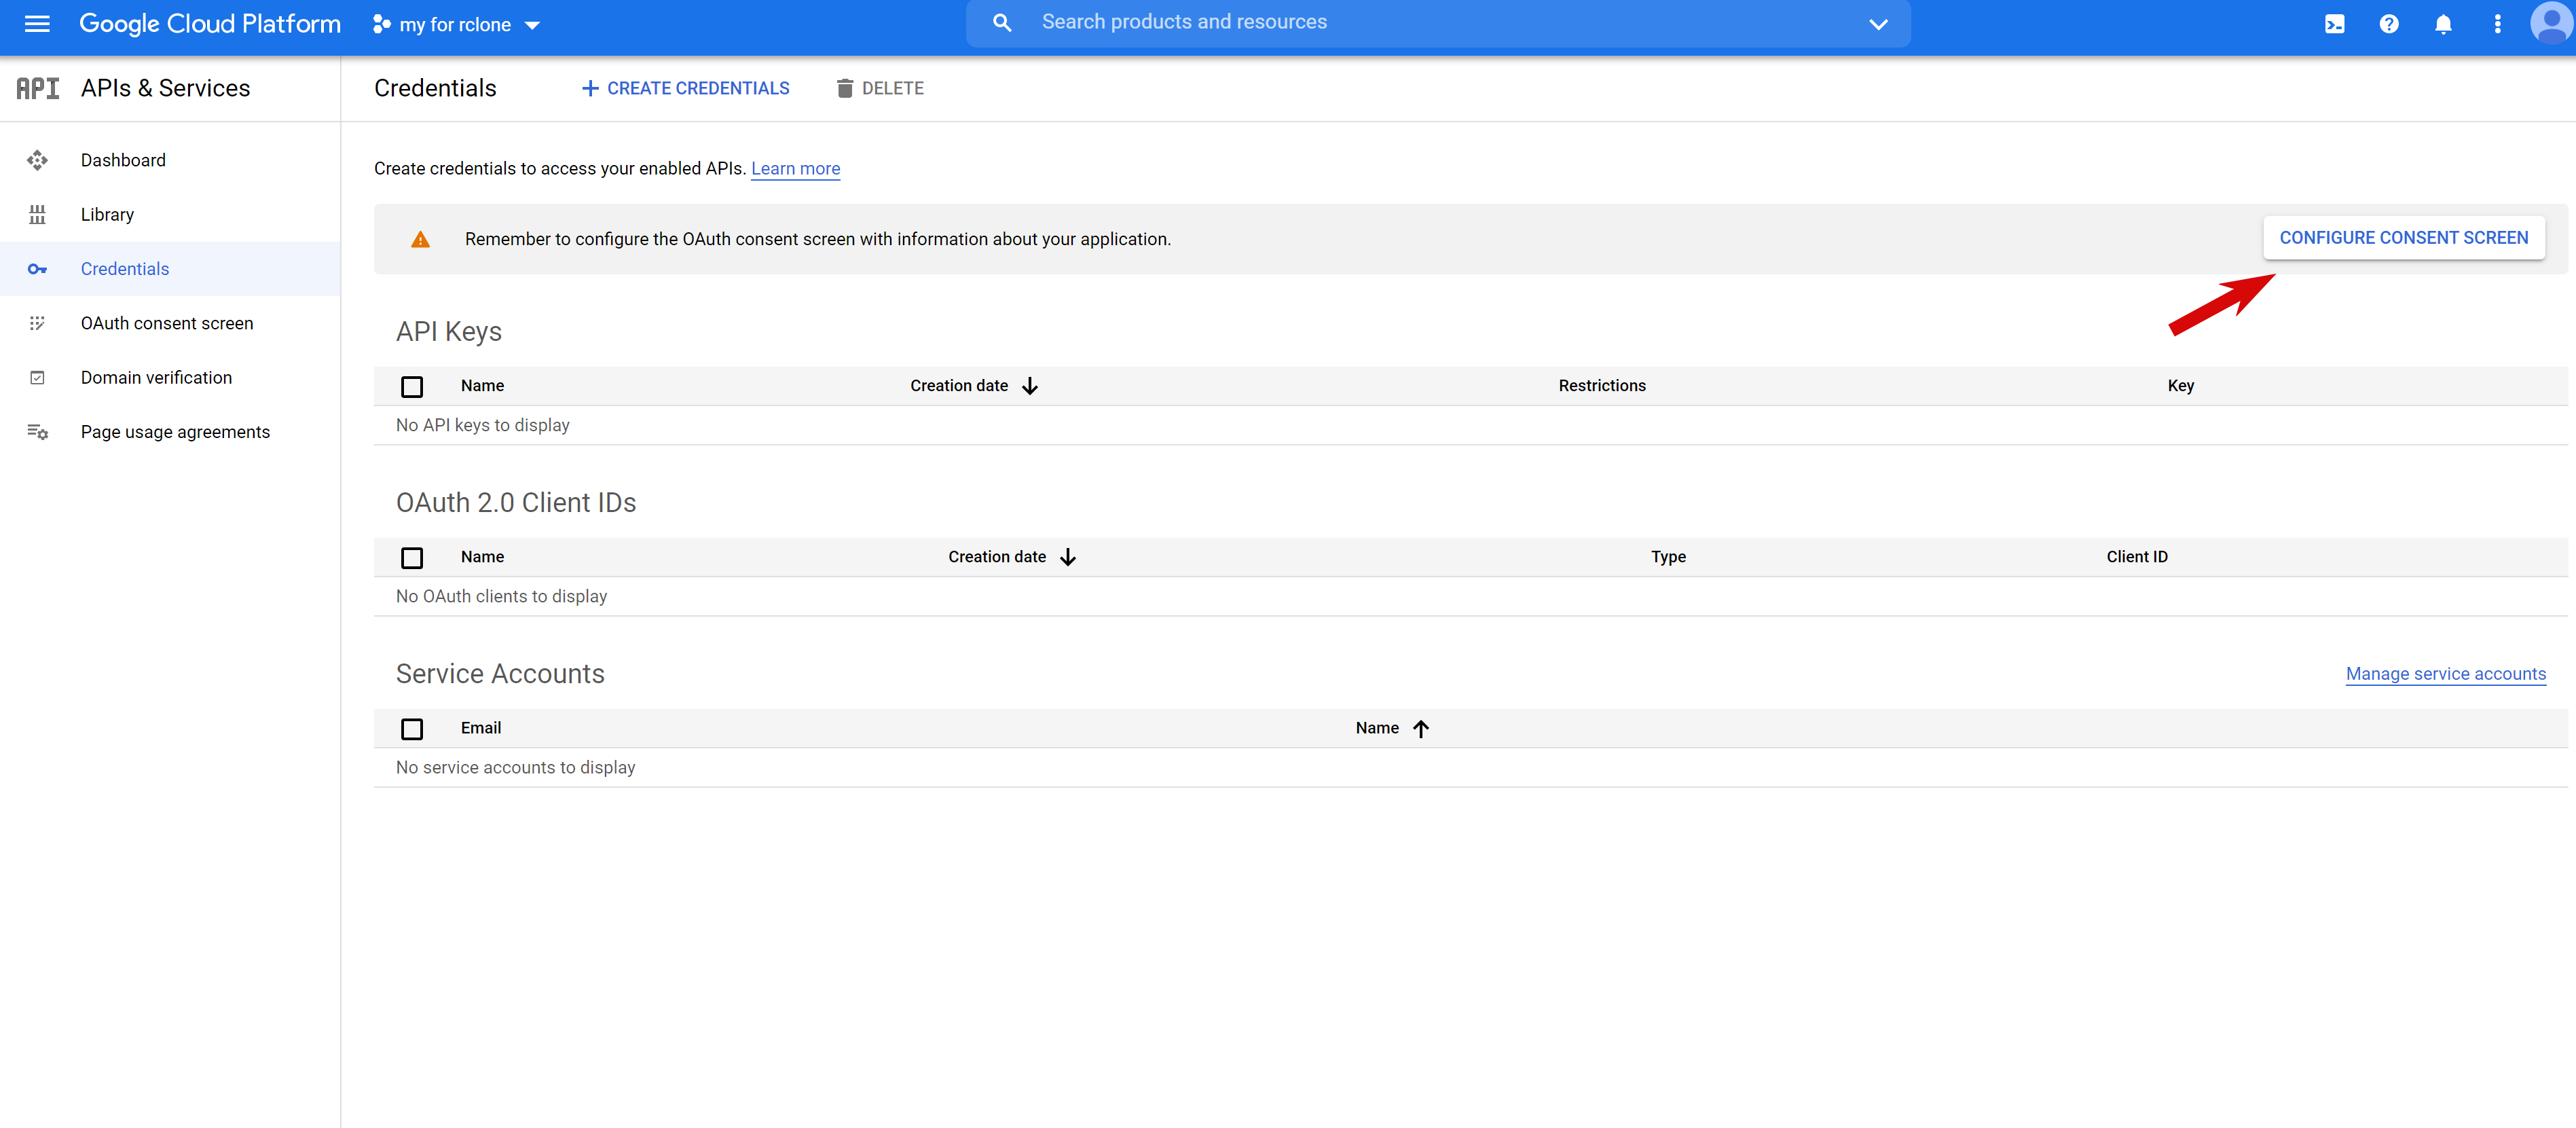
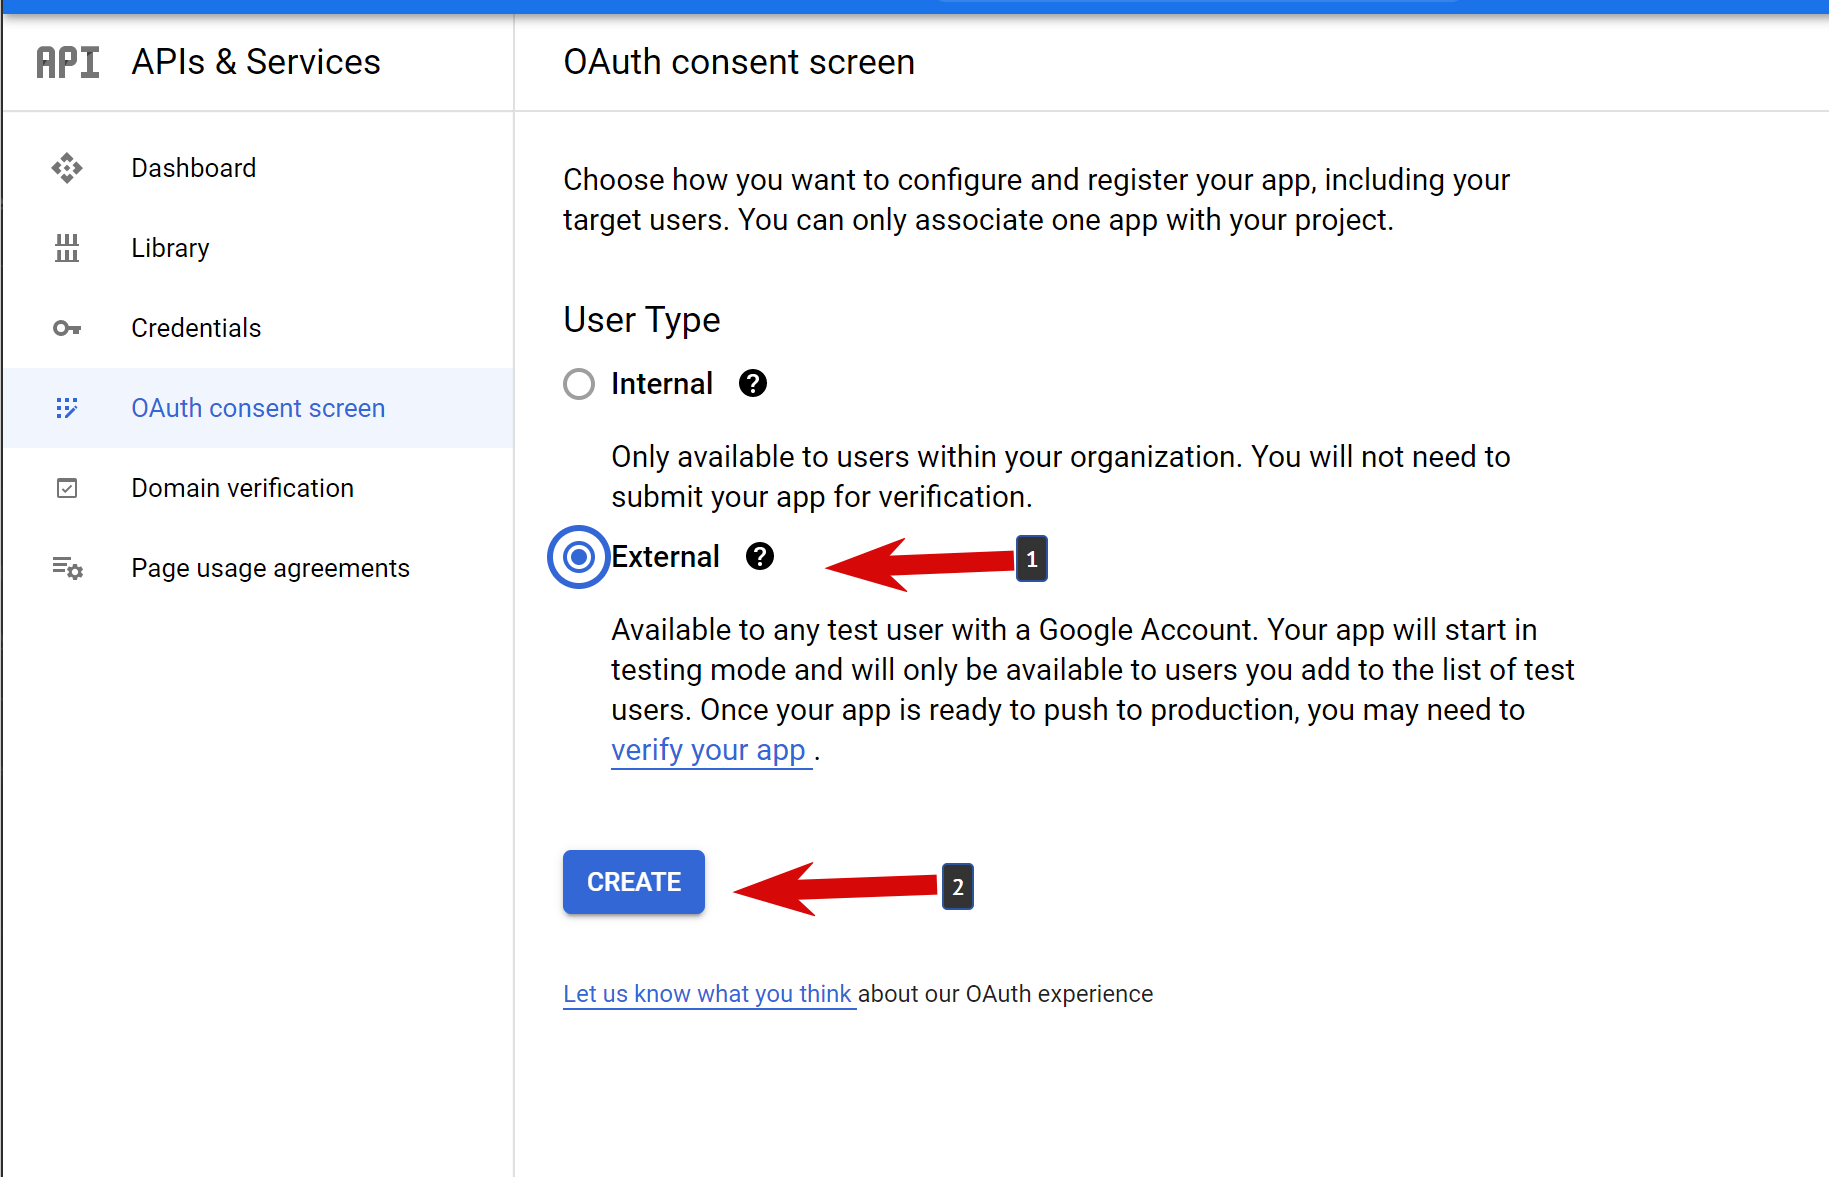
Google Drive Устанавливаем chunk значение 256Mb.
Увеличение этого параметра улучшит производительность, но обратите внимание, что каждый фрагмент буферизуется в памяти по одному на передачу.
Уменьшение этого параметра уменьшит использование памяти, но снизит производительность.
По умолчанию8Mb- этот вариант середина между производительностью и использованию памяти.
Смотрим какой размер у нас chunk.
- Ввод:
rclone backend get my_google_drive: -o chunk_size
- Вывод:
{
        "chunk_size": "8M"
}
- Ставим
256Mb.
Устанавливается в байтах, поэтому значение
268435456это256Mb.
- Ввод:
rclone backend set my_google_drive: -o chunk_size=268435456
- Вывод:
{
        "chunk_size": {
                "current": "256M",
                "previous": "256M"
        }
}
Google Drive Очищаем корзину.
- Ввод:
rclone cleanup my_google_drive:
- Вывод:
2021/02/22 21:47:52 NOTICE: Google drive root '': Note that emptying the trash happens in the background and can take some time.
- Как видим из ответа, из
Корзиныфайлы удалятся не сразу, для этого нужно определенное время. В документации сказано, что займетот одной минуты до одного часа, в зависимости от количества файлов.
Смотрим общую информацию по облачному диску.
- Ввод:
rclone about my_google_drive:
- Вывод:
Total:   15G
Used:    11.166G
Free:    3.814G
Trashed: 0
Other:   19.641M
Смотрим файлы в облаке из терминала lsd:
- Ввод:
rclone lsd my_google_drive:
- Вывод:
 16757874602 1970-01-01 03:00:00        -1 atadppa
           0 1970-01-01 03:00:00        -1 c1
   312838896 1970-01-01 03:00:00        -1 flashscripts
  1163717445 1970-01-01 03:00:00        -1 lqs